Expert Guide: How to Ensure That Your Handgun Never Fails?

Whether you’re a hunter, law enforcement official, or a shooting sports enthusiast, your handgun must be responsive every time to guarantee your safety and that of the people around you. Firearm failures often result in unintentional shootings, which is responsible for an average of 492 casualties every year.
Read on to find out the most assured way to establish reliability. Today, we will discuss the common handgun failures and ways to ensure that your firearm works one hundred percent whenever you need it.

Four Common Handgun Malfunctions

These are the four common handgun failures and why they occur.

Failure to Fire

A failure to fire occurs when the shooter pulls the trigger, and instead of the usual loud bang, they only hear a click, a moment of delay, and finally, the cartridge fires. Such failures often occur due to a faulty primer or firing pin. The cartridge could have fired at other times but lacked enough force to propel the bullet out of the barrel.

Failure to Feed

A failure to feed occurs when a cartridge does not load the magazine into the chamber. You’ll notice this malfunction when the ejection port fails to close completely, exposing the casing of the misfed cartridge. You’ll most likely encounter this issue when using faulty ammo or a magazine.

Failure to Extract

When your handgun fails to extract, the cartridge has been fired, but the spent casing cannot be removed from the chamber. When this happens, it prevents the user from feeding another round into the chamber. Several factors contribute to this malfunction, including human error, dirty chamber, and worn or oversized casings.

Failure to Eject

This malfunction occurs when the fired chamber is extracted from the cylinder but is not fully ejected through the ejection port. The casing may be jammed in the chamber or partially protruding from the ejection port. The possible causes of this firearm failure include oversized or malformed casings, dirty chamber, worn ejector pin, and improper grip.

What to Do When Your Handgun Fails?

Tap The Magazine
Tapping your magazine against a hard surface pushes the rounds to the rear of the magazine. It also helps to get rid of the dirt that could have clung to the magazine.
Rack The Slide
Grab the slide and try to rip it off the gun. The reason for doing this is to eject a chambered cartridge or spent casing or to allow the slide to strip a new one from the magazine and jam into the chamber.
Check The Chamber
Tilt the gun upward and look into the chamber to see what’s amiss.

4 Ways To Avoid Handgun Malfunctions

Shoot With Proper Technique
Firearms often fail in the hands of inexperienced users. Just because a user knows how to hold a handgun and pull its trigger doesn’t mean they know how to shoot properly. Getting some professional training would help users to handle their firearms more efficiently. A shooting academy should offer ample practice hours.
When handling a handgun, avoid riding the slide with your thumb, and don’t inadvertently push up on the slide lock during recoil. Doing any of these things can wear out the slide lock quickly. Also, to protect your firing pin, avoid pulling the trigger abruptly. Instead, ensure that you apply constant, increasing pressure on the trigger until the weapon fires. And after it fires, keep squeezing the trigger to avoid jerking the firearm before the bullet leaves the barrel.
Use Good Ammo
Damaged magazines, worn magazine springs, faulty cartridges, and dirt accumulation around the chamber can quickly result in a firearm failure. So you want to inspect these parts of your handgun before attempting to use it.
Using the wrong ammunition could be a problem too. For example, smaller shotshells will slip past the chamber and lodge in the barrel if you mistakenly load them into a 12-gauge firearm. When this happens, it could cause serious personal injury or firearm damage if fired.
Try to read and adhere to all the manufacturer’s instructions in the manual that comes with the ammunition boxes.
Clean Your Firearm
Every round fired through a handgun makes it dirtier, and at some point, it will be too dirty to function. Ensure that you clean your firearm regularly. Ideally, you should clean it after each use if it’s an everyday carry. Then you can get away with cleaning twice a month if you use it occasionally.
Even if you store your firearms throughout the year without using them, try to clean and oil them quarterly or once in six months. More importantly, use the right cleaning materials.
There are unlimited firearm cleaners on the market to choose from, so it can be pretty difficult to make a sound buying decision. To help you filter out the noise, we recommend these two cleaning products: Portable Firearm Cleaning Kit for Pistols and Rifles and Hoppe’s No. 9 Gun Bore Cleaner (5 oz. Bottle).
Store Your Firearms Properly
Firearms must be kept under favorable conditions to perform at their best. These conditions include a dry environment, airtight compartments, light-deprived enclosures, and moderate temperatures. Ideally, it would be best to store your firearms within a 30-50% range and a temperature of 70 degrees Fahrenheit.
But if you can’t measure or control these environmental elements, you can try out some storage options that are specially designed to provide such conditions.
There are several types to choose from, depending on your firearm’s size and how frequently you use it. Portable lockboxes and firearm cases are among the best options for temporary storage. In contrast, security cabinets and firearm safes are best for long-term storage.
To a large extent, the functionality of any firearm depends on its maintenance. And that’s where we focus on. Armory Den is a reliable solvent trap wholesaler offering top-notch gun cleaning solutions to firearm owners in America. If you have any questions about cleaning accessories or firearm maintenance, kindly reach out to us. We’ll be glad to help.
References:
https://www.shieldpst.com/malfunctions.html
https://www.therange702.com/blog/4-common-gun-malfunctions-and-how-to-troubleshoot-them/

Read More

How to Keep Moisture Out of Your Firearm Storage Facility and Protect Your Firearms?

If you’re a firearm owner, you know how important it is to keep your firearms in good condition. One of the best ways to do this is by preventing moisture from getting into your firearm storage.

Tips to Keep Moisture Out of Your Firearms

When it comes to firearm storage, moisture is your number one enemy. Moisture can cause firearms to rust and corrode, leading to serious damage. In order to protect your firearms from moisture damage, it is important to take measures to keep humidity levels down and keep moisture out of your firearm storage area. Some of the crucial steps you can take to achieve this include:

Using Vacuum Seal Bags

These are storage bags that are used to store firearms in vacuum conditions. The bags are available as either airtight zipper bags or heat-sealed bags. The firearm is placed in the bag and gently zipped up for airtight zipper bags to prevent any air from entering the bag. Once the bag is sealed, a vacuum pump is used to suck out any remaining air trapped in the bag.
On the other hand, the heat-sealed bags use a heat-sealing machine to seal the bags, subsequently pushing out any air trapped within the bag as it is sealed. However, because heat sealing machines are costly, this option is less popular than airtight zipper bags.

Use Firearm Safe Heating Rods

Some firearm safes come equipped with drilled holes to allow for heating rods. These heating rods are electrical appliances that are used to heat up the air within the firearm safe.
By supplying heat to the safe and keeping the air within the safe hot, the air temperature within the safe is maintained at a level that prevents the moisture in the air from condensing and damaging the firearms.
When the safe is opened, the hot air expands and is pushed out while cool air comes in, and the cycle begins afresh.

Install a Bulb in Your Safe (DIY Method)

Instead of using a heating rod, you can install an electric bulb in your safe. The electric bulb is a less expensive alternative to a heating rod. The bulb heats the safe and maintains the air at a temperature that prevents the condensation of water vapors in the safe.

Firearm Safe Dehumidifier

Some firearm safes come equipped with dehumidifiers lined in their walls to prevent moisture from damaging the firearms, while others use a silica gel dehumidifier. The humidifier is made from silica gel beds, which absorb moisture from the safe by leveraging the high-affinity silica gel has for moisture. These are usually blue or orange when fresh depending on the type of gel used, and eventually turn pink or green respectively, when saturated with moisture. The spent silica gel can be easily recharged to eliminate the absorbed moisture and reused until it’s time to replace it.

Silica Impregnated or Coated Firearm Socks

Firearm socks are another great way to store your firearms. The socks are fabric materials embedded with silica gel to absorb moisture from the firearms. The sock is used to cover the metallic or rust-prone parts of the firearm so that the silica gel absorbs any incoming moisture.

Desiccant Packs

Do you know those little packs that you always see whenever you buy a new shoe? Those are desiccant packs. They are usually filled with silica gel and are used to absorb moisture from the package.
In fact, some firearms even come with them when you buy them brand-new from the store. However, in case your firearm didn’t come with one, you can purchase a desiccant pack from your local store and place it in your safe.
Not that we’re asking you to fill your safe with little desiccant packs. But there are bigger ones that are made specifically for firearm safes and can serve much better than the little packs.
However, the beautiful thing about desiccant packs is that they can be oven-dried at 250 degrees Fahrenheit to remove the absorbed moisture and reuse it.

Room Dehumidifier

One of the most important steps to take when maintaining your firearms is to keep the humidity in the storage area relatively low. This can be easily achieved by using a room dehumidifier to keep the moisture levels within the room to a bare minimum.
You can also pair the dehumidifier with a humidity monitor to keep track of the humidity levels in the room so that you don’t leave the room too dry or at a very high relative humidity.

Use Antirust Agents

In the past, firearm owners used antirust oils to keep their firearms from the adverse effects of humidity. They coated the firearms with agents like cosmoline, which helped prevent the firearms from rusting when exposed to harsh weather conditions.
In fact, during WW2, entire tanks, firearms, and other metallic equipment were coated with cosmoline to prevent them from rusting. Of course, this is a less popular option nowadays because of the tedious task involved in cleaning and preparing the firearm for operational usage.
Nonetheless, some die-hard firearm enthusiasts still employ this protection method for their firearms.

Extra Tip

  • Don’t use sheepskin or foam cases to store your firearms. Sure, they might look classy for the moment, but they tend to absorb moisture which can easily damage your firearm.
  • Always wipe your fingerprints from your firearm before storing it. Your fingerprints contain dirt, debris, and moisture from your daily activities, which can easily cause your firearm to rust.

The Most Important Way to Keep Moisture Out of Your Firearm

Using a desiccant, heating rod, and other moisture removal devices is good, no doubt. However, before storing your firearm in your storage device, you need to clean it properly to remove dirt, debris, and moisture that might have been trapped during use.
And even if you don’t use your firearm often, it still comes in contact with dirt and moisture from the air, which needs to be cleaned off.
At Armory Den, we know the importance of firearm maintenance. We are dedicated to providing you with the best firearm cleaning solutions to ensure your firearm remains in optimum condition.

Read More

How To Lubricate Your Semi-Automatic Pistol Like A Pro

Have you ever wondered how professional firearm owners keep their weapons in top condition? One important aspect is proper lubrication, and it’s not as difficult as you might think. We’ll show you how to lubricate your semi-automatic pistol like a pro.
We’ll cover what type of lubricant is best, how often to clean your firearm, and tips for safely storing your firearm. By following these simple tips, you can keep your firearm running smoothly for years to come.

What is a semi-automatic pistol?

Semi-automatic pistols have an automatically cycling action that inserts the next cartridge into the chamber but require manual actuation of the trigger to fire the subsequent round. It differs from revolvers, which require the user to eject spent rounds and insert fresh rounds into the chamber by hand.
Semi-automatic pistols are often considered more reliable than revolvers. Plus, they are easier to use because they have better accuracy, faster reloading time, and reduced recoil.

How do you lubricate your semi-automatic pistol?

The best way to lubricate your semi-automatic pistol is to apply a light coat of firearm oil to all moving parts. This includes the slide rails, barrel, firing pin assembly, and trigger mechanism. Be sure to use enough lubricant to coat the surfaces evenly, but avoid using too much, as this can attract dirt and debris.
To lubricate your semi-automatic pistol for optimal performance, you need to use a quality lubricant. There are various types of lubricants on the market, but not all are suited to firearms. Some common options include:
  1. Firearm oil: This is a light oil designed to protect metal surfaces from corrosion and wear. It is also effective at reducing friction between moving parts.
  2. CLP: This acronym stands for Clean, Lubricate, Protect. CLP is a multi-purpose lubricant designed to clean and protect firearm parts from corrosion.
  3. Ballistol: This is an all-in-one lubricant that cleans, protects, and preserves metal parts. It can also be used as a firearm cleaner and degreaser.
  4. Silicone spray: This lubricant is designed to protect metal surfaces from corrosion and wear. It can also be used to reduce friction between moving parts.
Some lubricants may require you to apply a second coat after a certain amount of time, while others may need to be reapplied after each use. Be sure to read the manufacturer’s recommendations for the specific firearm you are using. Popular brands of firearm-specific lubricants include Break-Free, Mil-Comm TW25B, and Tetra Firearm Lube.
Extra tip: Avoid soaking your firearm in the lubricant for extended periods!

Benefits of lubricating your semi-automatic pistol

It was once thought that lubrication was bad for guns because it caused them to jam and malfunction. While this is true due to the presence of paraffin in past lubricants, advances in refining and manufacturing technology have rendered this statement false for modern weapons.
Modern lubricants are now produced without paraffin, making them critical to the functioning of handheld firearms. Nonetheless, some of the advantages associated with firearm maintenance include:
  • Lubricating your semi-automatic pistol takes care of impact wear and sliding friction in the firearm.
  • It ensures the reliability and safety of the firearm.
  • It increases the longevity of the firearm.
  • Prevents and eliminates common issues before they arise.

How often do I need to clean and lubricate my firearm?

You should clean your firearm after every use, or at least once a week if it isn’t being used regularly. When cleaning your firearm, be sure to disassemble it completely and clean all the parts, including the barrel, slide, frame, and magazine. This will help remove any dirt, debris, or residue that could build up over time and cause problems with the firearm’s performance.
To clean your firearm, you will need a few supplies:
  • A firearm cleaning kit: This should include a rod, brushes, rags, solvent traps, and cleaning solutions specifically designed for firearms.
  • Cleaning solvent: This is used to remove residue and debris from firearm parts.
  • Firearm oil: This is applied to protect metal surfaces from corrosion and wear.
  • A clean workspace: This can be a table, countertop, or any other flat surface where you can lay out all of your firearm parts as you clean them.
Be sure to follow the instructions that came with your firearm cleaning kit; however, if your firearm starts to experience problems such as jamming or improper ejection of rounds. In that case, it likely needs more frequent cleaning.

Firearm storage tips for your semi-automatic pistol

Once you have lubricated your semi-automatic pistol, it is important to store it properly to prevent corrosion and damage. The best way to do this is to keep it in a firearm safe or lock box when not in use. Here are a few tips to help you store your firearm properly in your home:
  • Store your firearm in a cool, dry place away from excessive heat or humidity.
  • Keep your firearm out of direct sunlight.
  • If possible, use a firearm case or holster to protect your firearm from scratches and corrosion.
  • Avoid leaving your firearm in a car or any other area exposed to extreme temperatures.
  • Even if you don’t intend to use your firearm, clean and lube it regularly to help prevent corrosion and damage.
Following these tips will help you keep your firearm in optimal condition and ensure that it performs well for years to come.

Lubricate your semi-automatic pistol like a pro

Lubricating your semi-automatic pistol is an important part of firearm maintenance. By using a quality lubricant and following the manufacturer’s instructions, you can help ensure that your firearm operates smoothly and reliably.
Clean your firearm before each lubrication process to keep it in top condition. Armory Den offers a variety of cleaning kits to help you clean your semi-automatic pistol properly without making a mess of the area. Don’t hesitate to contact us if you have any additional questions about firearm maintenance or firearm cleaning solutions. Check out our product page for all your firearm cleaning needs.

Read More

Firearm Safety Locks and How to Use them?

With the rate of firearm accidents growing every year, it’s essential to know how to safely store your firearm away from intruders and kids that can accidentally injure themselves.
Although most firearm owners know about the importance of firearm safety, very few people know of the different types of firearm safety locks and their various locking mechanisms.
We will explain the various types of firearm safety locks available, along with their various operating procedures.

What are firearm safety locks?

A firearm safety lock is a device used to prevent a firearm from firing or accidental discharge. It’s essentially a mechanism that helps ensure the safe handling of the firearm and reduces the risk of children or unauthorized users handling it to a bare minimum.

How do firearm safety locks work?

Firearm safety locks work by locking the firearm’s trigger or the firearm itself, preventing it from being fired. There are different types of firearm safety locks available on the market, each with its unique locking mechanism.
The general mechanism of firearm safety locks is designed to prevent unauthorized users from accessing them. Nonetheless, each safety lock uses a different approach to achieve this objective.
For example, locking mechanisms like trigger locks use on-hand firearms work to secure the firearm’s trigger by preventing unauthorized users from pulling the trigger. They accomplish this by using a keyed, combination, or biometric lock mechanism to secure the trigger properly, thereby preventing unauthorized users without the key from gaining access.
On the other hand, firearm safety mechanisms like vaults and lockboxes secure the firearm by providing a secure container that can store the firearm for long periods. Moreover, because of their size, firearm owners can conveniently store multiple firearms without purchasing multiple safety locks.
One thing to note is that most firearm safety locks are either key-based or combination-based. However, some locks also use biometric technology, such as fingerprints to provide additional security for the firearm.

Types of Firearm Safety Locks

There are several different types of firearm safety locks available on the market, including:

Trigger Locks

This is the most common type of firearm safety lock. Trigger locks work by locking the firearm’s trigger, preventing it from being pulled. You slide it over the trigger guard and engage the locking mechanism. Trigger locks are an excellent option for firearm owners who want to keep their firearms safe and secure, but they can be difficult to disengage if you need to use your firearm in an emergency.

Magazine Safety Lock

In firearms with a detachable magazine feed, a key-operated safety magazine unit is provided to replace the current magazine. Magazine safety locks work by locking the magazine release of the firearm, preventing it from being removed.
When engaged by a removable key, the safety magazine unit prevents itself from being removed from the firearm’s magazine and replaced with another live ammunition feeding device. Therefore, magazine safety locks are a great option for firearms with a removable magazine feeding device and can be easily engaged in emergencies as long as you have the key with you.

Cable Locks

Cable locks work by locking the barrel and receiver of the firearm together, preventing it from being fired. To use a cable lock, you have to thread the cable through the barrel and receiver of the firearm and engage the locking mechanism.

Firearm Lockboxes

Firearm lockboxes are box-like storage compartments built with reinforced steel to help secure firearms from burglars and harsh weather conditions. The boxes are either portable or stationary, with the major difference being that the portable type can be used to travel. In contrast, the stationary types are built for immobility. Their locking mechanism involves either a keyed or biometric lock depending on the type and model you opt for.

Firearm Cabinets

This locking mechanism is great for people who own multiple firearms and a large space in their homes. They are essentially built to accommodate up to eight or more firearms depending on the type or model you have.
Furthermore, their construction is sturdy on the outside and padded on the inside to give the firearms a cushioning effect. In addition, because of the number of firearms these devices can secure, they usually have a combination of multiple locking mechanisms to provide an extra layer of security to the firearms.

Firearm Safes

If you’re looking for the ultimate safety lock for your firearm, firearm safes are the way to go. These devices are constructed with thick reinforced steel to safeguard the firearm from intruders, fire outbreaks, and anything that can damage the firearm.
However, their prices are extremely high because of their design and quality, making them a popular option only for people who can afford them.

Benefits of Firearm Safety Locks

Using a firearm safety lock is one of the best ways to ensure that your firearm cannot be fired by anyone who should not have access to it. Firearm locks can also help prevent accidents, such as when a child gets hold of a firearm and plays with it.
Nevertheless, there are many other benefits to using a firearm safety lock, including:
  • Firearm safety locks help keep firearms safe and secure.
  • They prevent unauthorized access to firearms.
  • They help prevent common accidents and injuries.
  • They are an affordable way to keep your firearm safe.

Additional Tips for Safe Firearm Handling

In addition to using a firearm safety lock, you can take several other safety measures to ensure that your firearm is used safely. Some of them include:
  • Keep your firearm unloaded and locked up when not in use.
  • Store ammunition in a separate location from the firearm.
  • Never point the firearm at anything you don’t intend to shoot.
  • Keep your finger off the trigger until you are ready to shoot.
  • Be sure of your target and what is beyond it.
  • Never use alcohol or drugs before or while handling a gun.

The Best Way to Store Your Firearms

So, what is the best type of firearm safety lock? The best type of firearm safety lock is the one that works best for you. All the firearm safety locks mentioned above have their unique benefits and drawbacks, so choosing one that will fit your needs is important.
However, before you secure your firearm with your safety lock, it’s important that you clean it properly so that the parts are kept clean and responsive whenever you need it.
Armory Den has a variety of cleaning kits and solutions that can help you take proper care of your firearm and ensure its longevity. If you have any further questions about firearm safety locks or firearm maintenance, don’t hesitate to contact us.

Read More

Expert Advice: What is Dry Firing and Should You Do it?

If you’ve ever wondered what it would feel like to discharge a firearm without actually firing a live round, we’ve got news for you. Here’s your chance to do so, thanks to a term called dry firing.
But what exactly is dry firing? More importantly, why should you dry fire your firearm? We will vividly explain the concept of dry firing and what it entails.

What is dry firing?

Dry firing is the practice of discharging your firearm without any live ammunition being present in it. It essentially involves unloading your firearm of all ammunition, including the one in the chamber, and then releasing the trigger just as you would with a loaded firearm.

What type of firearm can I dry fire?

First, it’s important to know that firearms can be categorized into two depending on the type of ammunition used in them. The two categories used to distinguish firearms are:
  • Rimfire ammunition firearms
  • Centerfire ammunition firearms
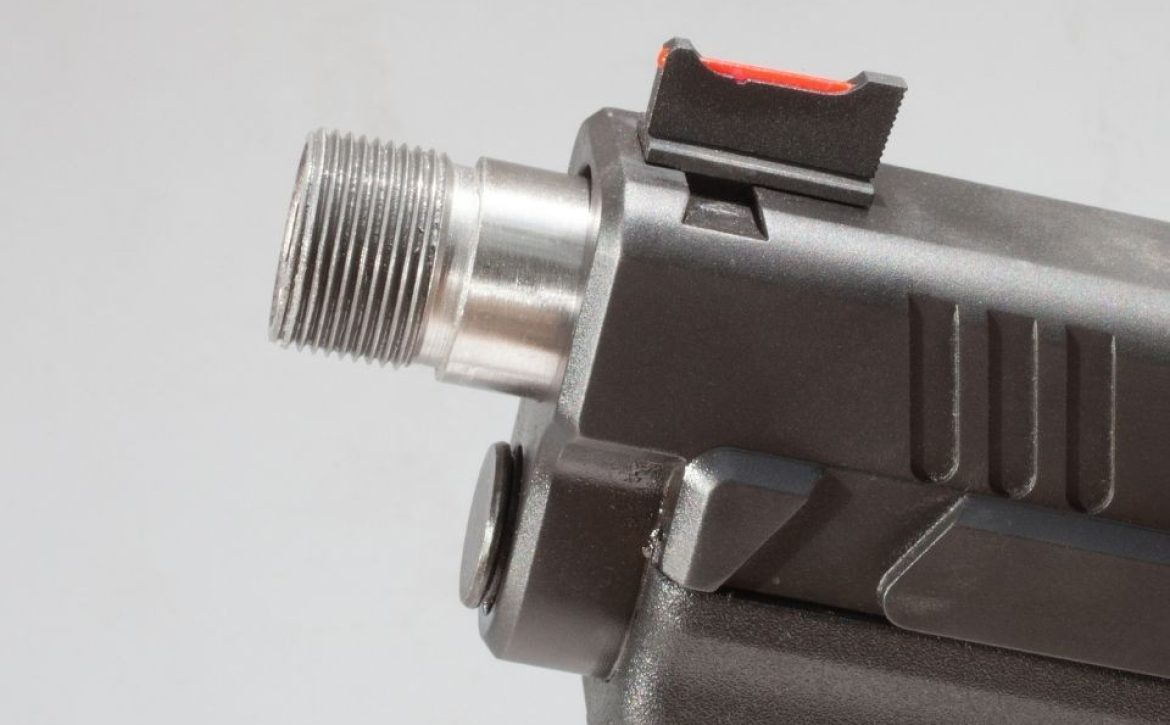
In the first category, the breech face of the firearm is made of a lighter material that is easily susceptible to preening when the firing pin impacts it without actually releasing any ammunition. This practice, if repeated continuously, can dent and eventually damage the firearm, causing it to malfunction when it is eventually loaded with ammunition.
The second category, known as centerfire ammunition firearms, is generally safe to dry fire. In this type of firearm, the breech face is made of steel, a far stronger metal that can withstand the impact of the firing pin a thousand times over without being dented.

How do I dry fire a firearm?

The concept of dry firing a firearm is quite straightforward. The first thing to do is visualize the entire process of actually firing a firearm. This includes:
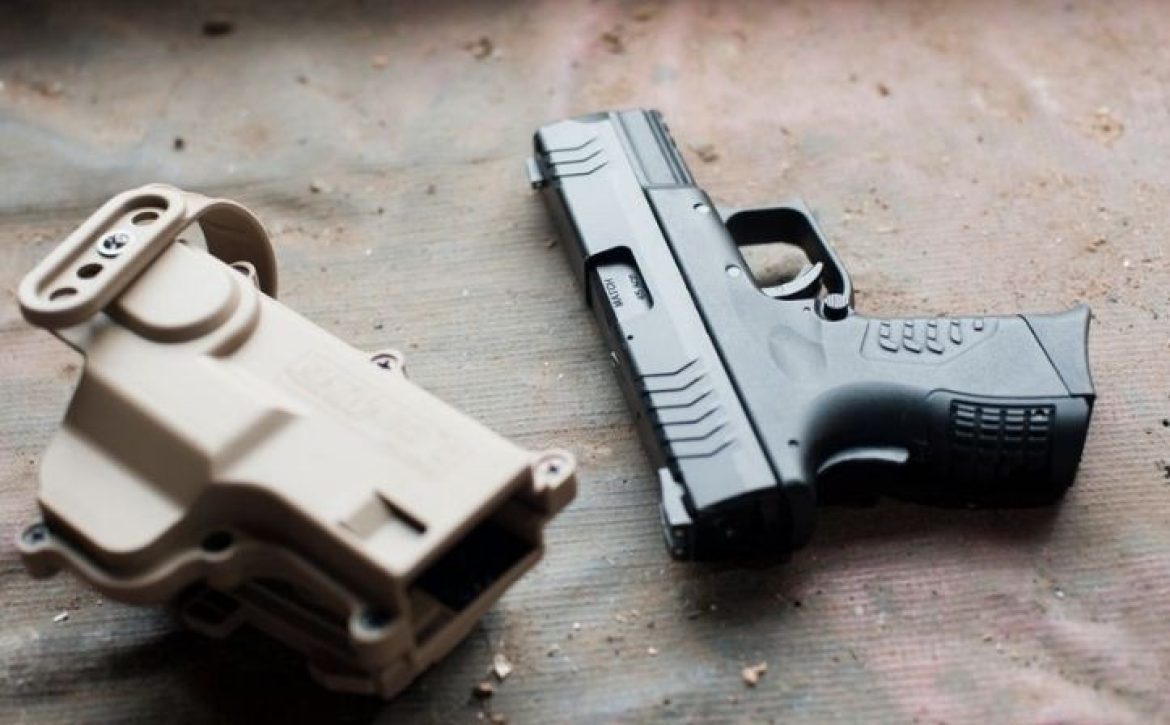
  • Drawing your firearm from its holster.
  • Gripping your firearm in the perfect stance.
  • Aligning your aim with your target.
  • Squeezing the trigger until you hear the click sound.
Once your visualization process is complete, it’s time to put it into practice. The next thing you want to do after visualization is to go to a safe area where there is minimal risk of damage to property in case you end up firing a live round.
Now draw out your weapon from its holster and aim it at a target. Be aware of your surroundings when handling firearms, so you don’t accidentally point or fire at anyone or anything.
Once your aim is fixed at a target, gently squeeze the trigger until you hear the click sound. Now pull back the slide to reset the trigger and repeat the same process all over. You can practice this continuously until you become more conversant with the process.
However, if you’ve never fired a firearm before, various YouTube videos and training materials can give you a visual demonstration of the process.

Why should I dry fire my firearm?

There are so many reasons to dry fire your firearm, such that even professionals who have handled firearms for years still engage in dry firing occasionally. Some of the reasons why you should dry fire your firearm include:

It improves your shooting skills

Whether you’re a newbie or an expert at firing firearms, there’s always room to get better and improve your skills. Dry firing allows you to do just that by providing an opportunity for you to practice your stance, aiming, and shooting skills without actually going to the range.

Enhances your accuracy

You’ve probably seen people shoot off a couple of rounds and hit their target with pinpoint accuracy. Most times, we even go from admiring their skill to wishing we were like them. Well, constant practice is the secret to such levels of accuracy, and the best way to achieve that without wasting precious ammo is by dry firing your weapon for practice.

Familiarization with firearm

It’s no secret that when you perform at an event regularly, it eventually becomes second nature. The same can be said for firearms. Constantly practicing with your firearm can help you become more familiar with your firearm’s grip, recoil, and aiming sight.
Moreover, the more you practice dry firing, you tend to build muscle memory with your firearm to the point that you can even perform certain operations on it with a blindfold. This should not be mistaken as advice to use your firearm with a blindfold.
In addition, you can also use dry firing to improve your aiming and shooting skills using your weaker hand; that way, you can easily adapt should the situation call for it.

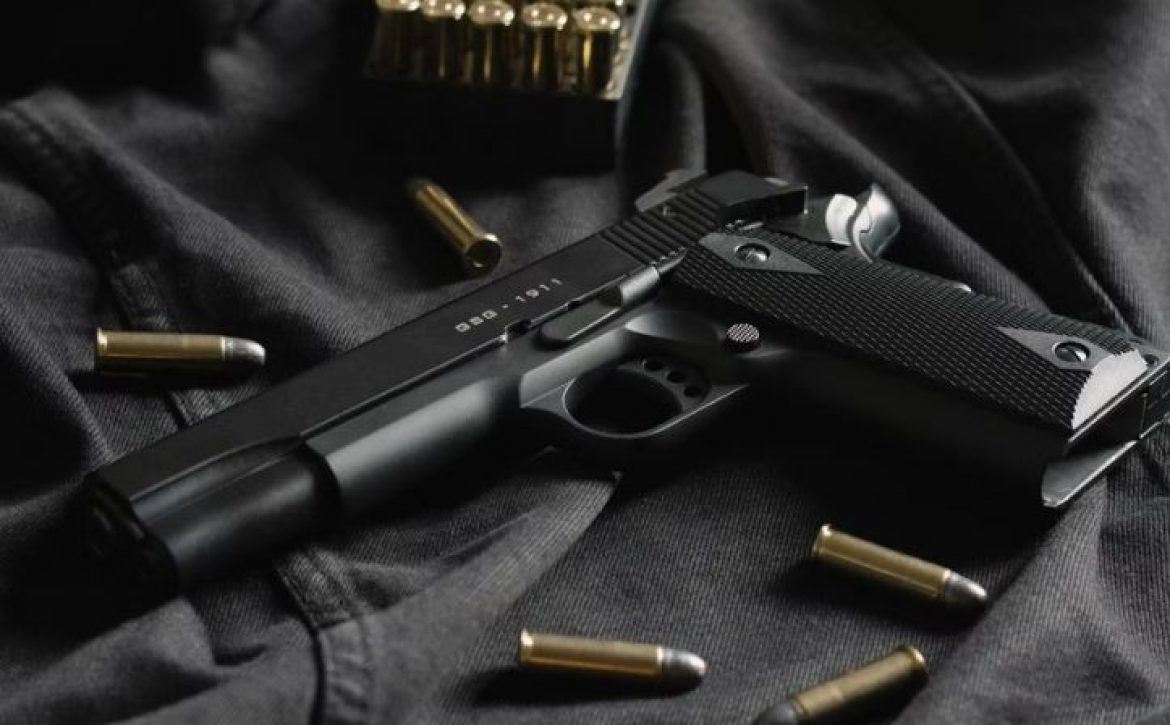
Save precious dollars on ammo

If you’re a firearm enthusiast, you’ve probably wondered what it would be like to fire your firearm without spending so much on ammunition. Good news! By dry firing your weapon, you can simulate all the firing procedures without having to spend a dime on ammo.

Is it safe to dry fire your firearm?

In general, dry firing your firearm is completely safe unless you have a rimfire ammunition firearm, an old firearm, or forgot to unload your firearm completely. Before dry firing your firearm, always double and triple check to ensure your firearm is not loaded with ammunition, including the one that is usually left in the chamber.
Furthermore, ensure that your firearm is aimed at a blank wall or in an open area to avoid accidents when practicing dry firing. It’s never advisable to practice dry firing with your firearm aimed at someone.
If you’re using a modern rim ammunition firearm, don’t forget to check in with your manufacturer to ensure your firearm is safe for dry firing, so you don’t risk damaging the firing pin or the firearm itself.
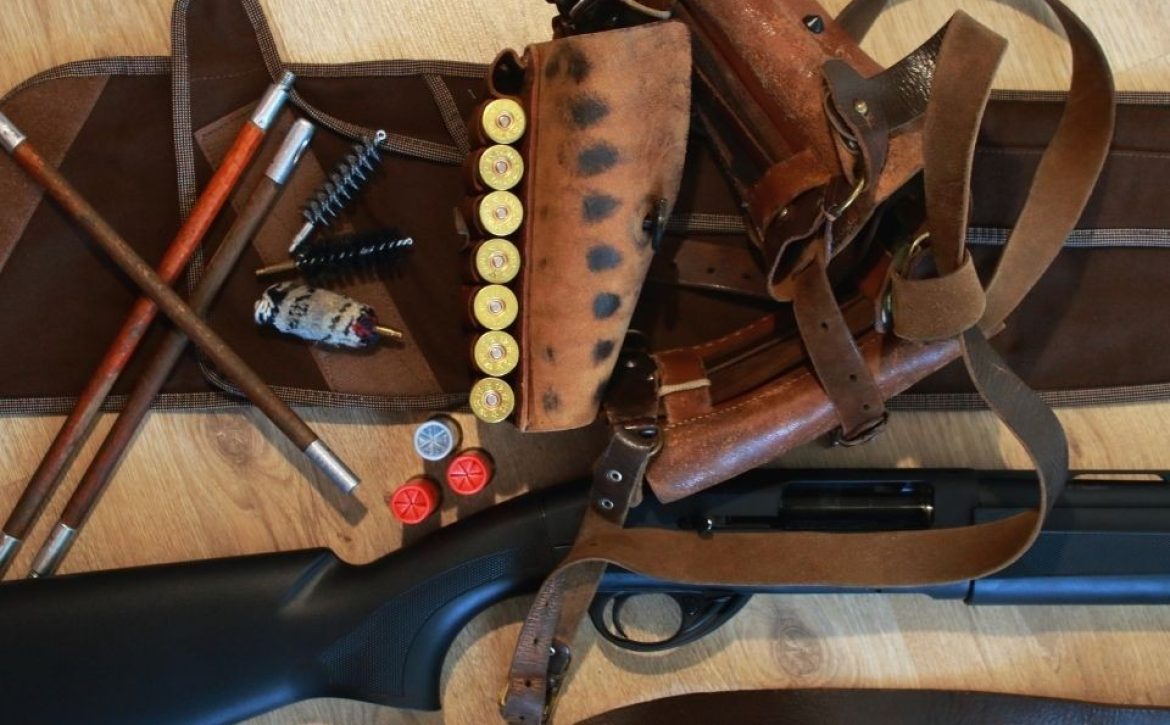
You can also use dummy rounds and snap caps to help protect the firing pin of your firearm. These rounds give the firing pin the same cushioning effect that a live round provides to the firing pin when fired.
Above all, always practice and adhere to firearm safety rules when handling your firearm, whether it is loaded or unloaded.

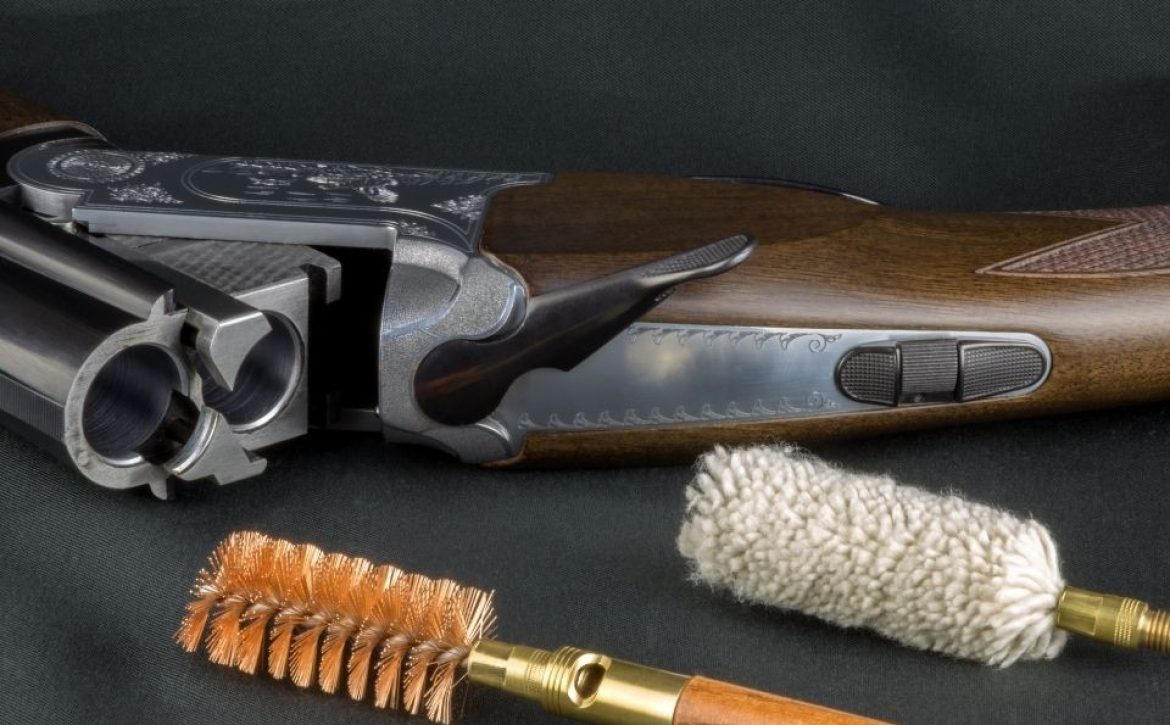
The safe way to dry fire your firearm

Regardless of whether you’re firing a live round or dry firing your firearm, it’s always advisable to clean your firearm properly so that all the parts work and function properly.
At Armory Den, we are committed to providing you with the best cleaning kit and solutions to help you keep your firearm safe and in perfect working condition. However, if you have any further questions about firearm maintenance, please don’t hesitate to contact us.

Read More

Don’t Make The Mistake of Trading Your Old Glock Too Soon

Glocks have a longer service life; an older Glock functions almost the same way as the newest model. Even if it’s been sitting in the safe for a while, you can still get your old Glock back into service through proper firearm maintenance and cleaning instead of trading it away. The old firearm will be as good as the new one.
If you’ve been planning on selling your old Glock, you might want to hold your horses. We’ll discuss why you shouldn’t be hasty to trade your old Glock.

Why You Shouldn't Trade Your Old Glock Yet

The design of most Glock generations enables them to hold onto their value for lifelong use. And that’s why you can still find Gen 1 and Gen 2 Glocks going for up to $400 on the market today.
But if you still feel like you need to upgrade your Glock, here are some reasons that might convince you otherwise:

1. All Glock Generations Function Much the Same

There are no striking differences in the mechanics of new Glock models and older Glocks. When Gen 5 Glocks came into existence, a handful of changes were more similar to Gen 2 and Gen 3 models.
Therefore, Gen 5 Glocks were not a replacement for Gen 4, as the shipment of Gen 4 firearms still happens.
Even though Glock took away finger grooves from Gen 5 firearms, they included a magazine stripping notch at the firearm’s grip front, a feature copied from Gen 2 firearm models.
A few more features added to Gen 5 Glocks are unnoticeable to the regular shooter, thus, providing no reason to secure the newest Glock model. You can still use your older Glock in the same shooting contexts range.

2. Aftermarket Upgrades for Older Glocks are More Than Those for New Models

Gen 5 firearms have been on the market for only a few years, and thus, their aftermarket upgrades are still few. Although manufacturers develop Gen 5 Glocks each day, their aftermarket industry is still developing.
That means you can get parts and upgrade Gen 3 and 4 Glocks easily compared to Gen 5. The aftermarket parts for these older model Glocks are so many that you can build a complete Glock firearm without sourcing a single factory part.

3. Old Glocks are the Same as Newer Striker-fired Firearms in Performance

Glocks are the very first striker-fired firearms. Other manufacturers came in with their striker-fired designs after the origination of Glocks. Though many of them are performing well, none can outperform an older Glock.
The only difference between old and new striker-fired firearms is ergonomics. But regarding reliability, accuracy, performance, and other measurable data points, they are the same.

4. Some Features in the New Glock Models Are Not Great

Among the new features on Gen 5 Glocks is the magazine stripping notch inclusion on the magazine well’s front. It may seem like a perfect idea, but quite frustrating when you are running the firearm under some stress.
The magazine stripping notch comes in handy when pulling out the magazine. However, it can be a hell of a problem when you need to get in a fresh magazine.
If you don’t line up the magazine well enough, its front edge may attach to the stripping notch, causing a reload mess.
Even so, there are those firearm owners who manage it well, or their fingers are thick enough to keep the magazine front from catching the cutout. But you wouldn’t want to let go of your old Glock, only to struggle with the magazine stripping notch on the new model.

5. New Glock Models are Expensive

Firearm prices are going up. If you hastily trade in your old Glock, you might spend a little more to acquire a new Glock model. But is it worth the investment? We prefer you save the money and keep the old Glock in your collection.
The newest Glock models bring nothing unique and intriguing in features and benefits to the table. They are the same as older Glocks in their performance. The older Glocks are far better regarding aftermarket upgrades as their parts are widely available.

6. Selling the Old Glock Under the Existing Laws Surrounding Firearm Sale May Be a Tedious Process

Firearm laws vary from one state to the other. They regulate the possession, sale, transportation, and use of ammunition and firearms.
Before you think of selling your old Glock, you will need to understand all the legal processes involved, depending on where you live.
In most cases, you will need to do a background check on the buyer to avoid selling it to a person who is not allowed by the law to own a firearm. Certain instances require you to obtain approval from the police state department, and you may also need to involve a lawyer. So, why go through such processes when you can still use your old Glock.

7. It is Easy to Clean and Maintain Your Old Glock

Your old Glock only needs proper cleaning and maintenance, and it will be as good as new.
At Amory Den, we offer gun cleaning solutions and supplies you need for firearm maintenance. They include solvent trap kits, cleaning brushes, muzzle extensions, and lubricating oil—everything you need to get your old Glock back in shape.
The firearm maintenance process is simple and only involves a few steps, which include:
  • Unloading and disassembling the firearm.
  • Cleaning out the barrel.
  • Cleaning the slide, the frame, and the recoil spring.
  • Applying lubricating oil to the moving parts.
  • Reassembling your Glock and testing it.
The maintenance routine of every Glock firearm depends on how frequently you use it. Generally, you can maintain your Glock by doing the following:
  • Clean the Firearm after Every Use. We recommend that you light-clean your Glock after every shooting session and deep clean it at least once every week.
  • Avoid Exposing It to Moisture and Dirt. Moisture is the enemy of every Glock or any other firearm. Therefore, if you have exposed your firearm to fog, rain, or snow, you have to wipe it off, clean it, and lubricate it as soon as possible. Do the same for dirt and dust exposure.
  • Store the Firearm Unloaded in a Cool and Dry Place. If you need your firearm to serve you for the longest time possible, be keen on where you store it. You may want to invest in trigger locks or safes to keep your firearm tamper-proof and safe.
If you clean and lubricate your old Glock properly, it will serve you longer than you think. Moreover, you will save a lot because there will be no need to buy new firearms. Besides that, you will boost the firearm’s performance, reliability, and safety. Use a solvent trap from Armory Den for the best firearm cleaning results.

Read More

Troubleshooting and Preventing Firearm Malfunctions: Expert Guide

Shooters often encounter occurrences they are unprepared for, such as firearm malfunctions. Even high-quality firearms may produce unintended effects that may cause injury or damage to the firearm. Firearm malfunction can be caused by the shooter, the ammunition, or the mechanics of the firearm. Educating yourself beforehand will aid you in identifying and fixing common malfunctions avoiding dangerous consequences.
We have highlighted five common firearm malfunctions and how to fix them.

Squib Load

Usually rare and often occurring in 1 of 100000 rounds, squib load or rounds have severely low propelling energy to push the bullet out of the firearm. Squib load results in the lodging of the projectile between the muzzle and chamber.
Suppose the shooter fails to notice the obstruction in the barrel, and another round is fired. In that case, it will result in a disastrous failure of the structural integrity of the firearm or injury to the shooter.
Squib rounds are usually a result of insufficient or lack of powder, failure of powder ignition, deformed bullets, using a bullet too large for the barrel, and handloading by an inexperienced reloader.
Signs that squib rounds have occurred are a much quieter discharge sound, smoke from the ejection port, and a light recoil force. In semi-automatic firearms, there is a failure of cycle action.
If you notice a squib load, stop firing to prevent firearm damage and personal injury. Remove the magazine, lock the action open on a semi-automatic firearm, and eject the used casing. Inspect the bore for signs of a stuck bullet, and unload the firearm. If there is a stuck projectile, have a gunsmith remove it.
You can prevent squib load by using quality ammunition.

Misfeed

Misfeed is the most common firearm malfunction which occurs when a round is incorrectly chambered. The round fails to enter the chamber as required; the firearm is thus unable to fire due to the lack of rounds in the chamber.
Firearm misfeed is often a result of worn-out recoil spring, incorrect grip, when a magazine is not fully seated, dirty or faulty magazine, and dirty chamber.
If your firearm cannot fire due to a misfeed, open the action and point your firearm downward. The partly chambered cartridge will eject. Alternatively, you can remove the cartridge manually.
If the misfed cartridge falls out, put the magazine back, feed the next round of ammunition, and start firing. If the cartridge is partly chambered, hit the back of the firearm’s slide to push the cartridge back into the chamber.
If the cartridge is stuck, remove it with the help of a gunsmith.
Following correct grip rules, using quality ammunition, and regularly inspecting for defects can prevent a misfeed. Clean your firearm regularly using the right firearm cleaning tools to prevent failure and keep your gun in good working condition.

Failure to Eject

Failure to eject, also known as a stovepipe, occurs when the bullet casing fails to exit the chamber after firing. The casing gets stuck, blocking the slide from getting back into the battery. The slide fails to close, and the firearm jams. The firearm will malfunction and, in some cases, be unable to fire.
The leading causes of failure to eject are defective ammunition, faults in the ejection mechanism, build-up of dirt, worn casings, and spin back.
To remedy this, rack the gun slide aggressively. Rotate the wrist of your shooting hand 90° inwards with your finger off the trigger and cycle the action until the case is ejected. If you have a revolver, apply force when hitting the ejector rod.
You can prevent stovepipe by cleaning your firearm regularly with the help of solvent traps for increased accuracy and safety.

Hang Fire

A hang fire is a delay in a discharge after firing. Usually, a hang fire lasts a few seconds but may take longer if your firearm has malfunctioned. It occurs when a delay in propellant ignition occurs after triggering the firearm. The hammer falls when the trigger is pulled, but the firearm does not shoot immediately.
Hang fire is caused by the incorrect closing of the bolt, applying the wrong lubricant, which can reduce the speed of the striking pin, and reloading issues. A damaged firing pin can also cause a hang fire. The malfunction poses potential damage to the firearm and severe injuries to the shooter on failure to practice proper muzzle control.
If the shooter attempts to open the firearm to remove a faulty cartridge, it can ignite, causing damage to the gun and severe injury.
When a hang fire occurs, point the firearm in a safe direction for several seconds and remove the ammunition. Ensure the bolt is closed properly before removing the round, open the chamber carefully and eject the round. During a hang fire, shooters should handle the firearm with caution, as it can fire at any time.
To prevent hang fire, ensure the bolt is closed correctly, clean the firing pin assembly, use the right gun lubricant, and observe proper firearm maintenance.

Double Feed

Double feed occurs when two rounds are moved to the chamber simultaneously in a semi-automatic firearm; this is caused by a faulty recoil spring and magazine. During a double feed, the action stays open, a round in the chamber is loaded and another fed behind it.
The firearm cannot fire due to the unavailability of room for both rounds, which causes the gun to lock up with the slide partly to the rear. To clear the double feed, point the firearm in a safe direction, remove your finger from the trigger and lock the slide.
Cycle the action repeatedly until the cartridge falls out. To prevent double feed, ensure the slide is fully cycled, practice proper grip when shooting, and do regular firearm maintenance.
Firearm malfunctions can be caused by shooter issues or firearms mechanics. It is important to practice fixing malfunctions like squib load, misfeed, failure to eject, hang fire, and double feed. Use the correct ammunition to prevent firearm malfunction, which can wreck your gun and cause serious injury. Proper maintenance and compliance with firearm safety rules can prevent malfunctions and make your firearm last longer.

Read More

The Standard Thread Pitch of an AR-10 Platform

The standard thread pitch of an AR-10 platform is 5/8×24. Stick with this dimension when considering attaching a muzzle device to your AR-10 platform. In general, the AR-10 platform uses the 5/8×24 thread pitch, although there are some exceptions.

Overview of the AR-10 platform

What is an AR-10 platform?

The AR-10 is a 7.62mm/.308 caliber firearm platform that was developed in the 1950s. It was originally designed as a military assault firearm but has since become a popular choice for hunting and target shooting.
Modern AR-10s, on the other hand, are gas-operated magazine-fed firearms that can be fitted with a variety of sights and accessories. They offer a cutting-edge design that is versatile and distinctive, making them an excellent choice for various firearms enthusiasts.
One thing to note is that although the AR-10 looks similar to the AR-15, it is considerably larger to accommodate the greater chamber, magazine, and cartridge.

Examples of top AR-10s

There are many different AR-10 rifles on the market. According to Pew Pew Tactical, these are some of the best out there:
  • Aero M5E1 .308
  • LWRCi REPR MKII 7.62 Rifle
  • Daniel Defense DD5V2
  • Brownells BRN-10 (Retro AR-10)
  • Palmetto State Armory AR-10 (PA-10) Gen 3
  • Sig Sauer 716i Tread
These are just a few examples of the many different AR-10 platforms available on the market today.

What is an AR-10 good for?

AR-10s are popular firearms for a variety of reasons. They’re accurate, reliable, and versatile and can be used for hunting, target shooting, long-range shooting, or home defense.
Moreover, the AR-10 can be configured to meet the shooter’s specific needs because of its wide array of available calibers.
So, if you’re looking for a new firearm, an AR-10 is a great option. Just be sure to choose the correct thread pitch for your AR-10.
Now that you understand your AR-10, here are a few things to know about its thread pitch.

What is Thread Pitch?

Thread pitch is the distance between two threads on a screw or bolt. It is essentially the distance between two sharp corkscrew parts of the barrel. Thread pitch is measured in millimeters (mm) and is usually stated as “threads per mm” (e.g., M12x1.5) or “threads per inch” (e.g., 5/8×24) depending on the country or region.

How to measure thread pitch?

The best way to do it is to measure thread pitch is with a thread gauge. You can also use a micrometer, steel ruler, or caliper, but using a thread gauge is usually easier.
To measure the thread pitch, place the gauge over the threads and count the number of threads per inch. However, if you have a caliper or steel ruler, use the device to measure the distance between two adjacent threads expressed in millimeters.
AR-10s typically have 24 threads per inch, but there are some exceptions to this, as you will see later on.

Exceptions to using 5/8x24 as the standard threading for 7.62mm/.308 firearms

AR-10s chambered in 7.62mm/.308 typically has a thread pitch of 5/8×24—this is the most common thread pitch for AR-10s, but there are some exceptions. For example, some AR-10s are chambered in calibers that use a different thread pitch, such as 1/2×28 for .223 Remington/5.56 NATO or 7/16×28 for .300 AAC Blackout.
Other AR-10s that use a different thread pitch include:
  • Smith & Wesson M&P10 (9/16×24).
  • DPMS Panther Arms LR-308 (5/8×32).
  • Accuracy International uses the M18x1.5 thread pitch.
  • Sako TRG uses the M18x1 thread pitch.
  • FN SCAR 17 uses a 5/8×24 thread pitch.
  • Ruger AR-10 uses a 1/2×28 thread pitch.
When handling an AR-10 firearm, it’s important to know what thread pitch your AR-10 uses so that you can choose compatible accessories and parts. However, if you are considering attaching a muzzle device to your AR-10, then a thread pitch of 5/8×24 is your best bet.
Nonetheless, if you have any further questions about the standard thread pitch for another firearm in your collection, don’t hesitate to reach out to Armory Den.

Read More

A Better Understanding of Thread Pitch

When it comes to thread requirements, those of us who use muzzle devices and stock barrels understand what the deal is. Nevertheless, not all barrel threads are made equal, as evidenced by specific installation options.
It can be a daunting task to pick the perfect thread pitch for your firearm. That is why our experts have stepped up to help you. Read on to find out about the distinct firearms and the thread pitches that are right for you.

What is a Thread Pitch?

The ‘threads’ refer to the sharp, corkscrew-shaped part near the barrel’s end. And “thread pitch” is the distance between adjacent threads in millimeters.
The length is measured in the direction parallel to the thread axis as a point of context. This is an integral unit that helps measure and specify threaded fasteners.
A comparator, steel rule, or digital vernier caliper can be used to gauge a firearm’s thread pitch, or you could use a thread gauge as well.

Types of Thread Pitch

Common AR 15s have only two thread pitch options. For 1/2×28 is for 5.56 NATO works well. The 300 blackout a 5/8×24 thread pitch works. The standard thread pitch of the AR-10 platform (7.62×51) is 5/8×24.

Common Thread Pitch Sizes

1/2 x 28 thread pitch is referred to as the standard thread pitch. It has a diameter of 1/2 mm and is made up of 28 threads per inch; each thread runs the entire length of the firearm’s muzzle. As you would expect, the 1/2 x 28 thread is a right-hand thread which means you tighten it in a clockwise direction and loosen it in a counterclockwise direction.

How to Identify Thread Pitch and Size

In most cases, the owner’s manual or the product page on the manufacturer’s website offers all the thread specs you need. Some muzzle devices even have the thread information etched or embossed into the mount itself.
But how can you know this information for a new piston or mount for an older rifle or an imported pistol?
Taking your firearm to a trained gunsmith is always a good idea, but most of us prefer to handle the upkeep and modification work ourselves. The good news is that you can learn a lot about how your barrels thread on your own using some simple procedures—no need to consult a specialist.
If there are no markings on the handgun, you can determine the threading by looking at the numbers on the firearm. The first number informs you of the gun’s outside diameter, while the second number tells you how many threads are in an inch.
Alternatively, you can use a screw pitch gauge to measure the thread pitch. To get started, follow these simple instructions:
  • You can use a screw pitch measure to check the thread to each gauge till you find a match
  • It’s imperative that you obtain an exact match due to the existence of identical metric thread shapes
  • Knowing when the gauge is precisely where it should let you know when you have a match
  • The pitch size can be determined by taking a reading at that point

Different Thread Pitch Adapter Sizes Explained

Adapters for changing the thread pitch of a pressure gauge are available. Thread pitch varies widely among manufacturers, necessitating the use of thread adapters.
Why are there so many different calibers available in different sizes? Because the amount of threading residual barrel material (often referred to as “meat”) varies depending on the bore diameter. There are smaller threads for smaller bores.
Here is all about different thread pitch adapter sizes that you would need to know:

1/2x28

.22MAG, .22LR, and .17HMR calibers
Rimfire calibers have a consistent thread size of 1/2×28.
The barrel of a lot of .22LR handguns is threaded under the slide. Walther P22, GSG 1911, Sig Mosquito, and Ruger SR all use threading under the slide. To use an adaptive solvent trap on these pistols, you’ll need an adapter to reposition the threads at the front of the slide.
Various CZ guns employ a 1/2×20 thread pitch. A thread adapter will be needed to fit a CZ rifle’s threads because of this thread pitch.
9mm
The pistol caliber carbine (PCC) and handgun use the 1/2×28 thread pitch. The barrel thread on a few guns varies from model to model.
  • The thread pitch used by H&K weapons is M13.5×1 LH
  • The thread pitch used by Glock pistols is M13.5×1 LH
  • This thread pitch is used by Sig Sauer firearms (except P320 versions, which employ New Hampshire-made barrels in 1/2×28) except the P320
  • 1/2×30 thread pitch is used by H&K MP5-N
5.56mm (.223)
AR-15s chambered in 5.56mm (.223) typically employ the 1/2×28 thread pitch. However, there are exceptions:
  • The M15x1 thread pitch is used by H&K guns
  • 9/16×24 thread pitch is used in the Ruger Mini
  • The M13x1 LH thread pitch is used by Steyr Aug

5/8x24

“.30 caliber” cartridges and 7.62mm (.308)
This is the most commonly used type of threading. However, there are a few situations in which 5/8×24 may not be the most appropriate threading for 7.62mm/.308 firearms:
  • This is the thread pitch used by Accuracy International
  • The Sako TRG has a thread pitch of M18x1
  • With a thread pitch of 5/8×24, the FN SCAR 17 can be used
  • There are a variety of thread pitches used in AK-47s
  • Eastern European and most American-made guns use the M14x1 LH thread pitch
There are many different thread pitches other than the standard ones featured here. This is just to give you a general idea of common threads used in barrel threading.
So make sure that you consider what you plan to attach to the barrel and know its thread pitch before placing the order.
If you have any queries or concerns, feel free to get in touch with us, and we’ll do our best to help. 

Read More

A Comparison Between the NEW 9″ Aircraft 7075 Aluminum Solvent Trap (1.375-24 TPI) and the 9″ Aircraft 7075 Aluminum (M36x1.25 TPI) Solvent Trap Kit

Armory Den has a new version of a popular solvent trap kit.  We will compare how they are similar and equally different in several ways.  The latest model released is the 9″ Aircraft 7075 Aluminum (1.375-24 TPI) Solvent Trap Kit. The other solvent trap is an older model, the 9″ Aircraft 7075 Aluminum (M36x1.25 TPI) Solvent Trap Kit. These two are some of the best on the market and are constructed from superior 7075 aircraft aluminum. Since they are almost identical, it could prove challenging for buyers to decide between them. Below is a detailed comparison of these two solvent trap kits with a list of the similarities and differences to help you make a much more effortless buying decision.

Similarities

These solvent trap kits share similarities in a number of ways, including:

Tube Material and Finish

Both solvent trap cleaning kits are constructed from high-grade 7075 aircraft aluminum to ensure durability. Moreover, they have a military-grade Type 3 Hard Anodized finish to enhance their strength.

Length

Both solvent traps are 9″ long. Originally, they were 7″ long, which was adjusted to accommodate the K-stackable cups well. Additionally, they include a 1/2×28″ and 5/8×24″ thread protector.

Design

Both cleaning kits have a groove design. It makes handling the solvent traps during cleaning easier. Moreover, the grooves reduce the chances of accidentally dropping anything, subsequently minimizing the level of damage.

Additional Products

These kits come with stackable K storage cups. Each K-style cup has a lip at its bottom part, which tightly seals the trap during transport. The stackable cups can also function as solvent trays, and you could use them as storage compartments while on the road.

Differences

The main differences between these two kits are notable in their:

Diameter

The 9″ (1.375-24 TPI) Solvent trap has an Inner Diameter of 1.355″ (D-Cell) and a 1.656″ Outer Diameter. In contrast, the older version has an Inner Diameter of 1.375″ (D-Cell) and a 1.73″ Outer Diameter.

Weight

The new model weighs 26.5 oz, which is 4.4 oz lighter than the 9″ (M36x1.25 TPI) solvent trap kit’s 30.9 oz.

Internal and External Thread

The 9″ (1.375-24 TPI) solvent trap has an Internal Thread of 1.1875-24 TPI and an External Thread of 1.375-24 TPI, whereas the old solvent trap has an Internal Thread of M36x1.25 and an External Thread of M36x1.25. With the exception of the 1.45″ OD Aluminum and Titanium Tube Kits that adapt to an M34x1.25 to 1.1875-24 TPI standardization adapter offered by Armory Den – All of Armory Den’s metrically threaded solvent trap kits are “Direct Thread Only” and do not offer adaptability for quick attach/detach devices used for streamlined cleaning.

Thread Compatibility

The new solvent trap is compatible with a Thread Pitch of 1.1875-24 TPI. On the other hand, the old one is compatible with Direct Thread only.

Alternatives

The old cleaning kit has two alternatives; the 9″ Aircraft Aluminum Solvent Trap (1.375-24″) and 10″ Aluminum 1.75″ OD Solvent Trap Kit. In contrast, the new model only has one, the 10″ Aluminum 1.75″ OD Solvent Trap Kit.

Firearms That are Compatible with the 9″ Aircraft 7075 Aluminum Solvent Trap (1.375-24 TPI) and 9″ Aircraft 7075 Aluminum (M36x1.25 TPI) Solvent Trap Kit

Whether you’re a seasoned firearm user or a novice, choosing the right firearm that you can work with either or both of these solvent trap kits might be confusing. Below are some options that can work for you.

Pistols

Pistol options here include:
  • After Market Barrels
    • .22 | 1/2×28
    • 9mm | 1/2×28
  • Beretta
    • 9mm | 1/2×28
  • CZ
    • 9mm | 1/2×28
  • FNH
    • 9mm | 1/2×28
  • Ruger
    • .22 | 1/2×28
  • Smith & Wesson
    • .22  | 1/2×28
  • Styler Arms
  • 9mm | 1/2×28

Pistol Caliber Carbines | Sub Firearms

The common pistol caliber carbine options here include:
  • CMMG
    • 5.7×28  | 1/2×28
  • CZ
    • 9mm | 1/2×28
  • Kel Tec
    • 9mm  | 1/2×28
  • MP5 Variants
    • 9mm  | 1/2×28
  • Sugar
    • 9mm  | 1/2×28
  • Quarter Circle 10
    • 9mm  | 1/2×28

Rifles

The rifle options to consider are:
  • Common Thread Pitches by Caliber
    • 5.56 | 1/2×28
    • .22 | 1/2×28
  • Common Thread Pitches for AR’s
    • 5.56 | 1/2×28
  • CMMG
    • 350 Legend | 1/2×28
  • CZ 
    • Bren S1 | 1/2×28
  • FNH
    • FN 15  | 1/2×28
    • SCAR 16 | 1/2×28
  • H&K
    • MR556A1 | 1/2×28
  • IWI
    • 5.56 | 1/2×28
  • Ruger
    • 350 Legend | 1/2×28

Pros and Cons

Settling for either of these solvent traps comes with an in-depth analysis of both their benefits and shortcomings.

Pros

Although these solvent trap kits have some differences, they share several benefits. First, both are made from Aluminum for extra durability, thus extending their lifespan. Other than that, they are currently selling at discounted prices, meaning that you will enjoy excellent quality products at competitive price points.
Another advantage of these kits is that they come with stackable K-style cups. The storage cups are unique to them, and they make maintenance more efficient, as mentioned earlier in this article. Furthermore, they are multi-purpose, thus giving you value for your buck.
Lastly, both cleaning kits can be attached to a wide selection of firearms.

Cons

Like everything else, the solvent traps in this article have their cons. In this case, the downside is that their parts are incompatible with the 7″ AD-EX Aluminum Solvent Trap.

Which Solvent Trap Kit is Better?

The primary difference between the 9″ (1.375-24 TPI) cleaning kit and 9″ (M36x1.25 TPI) solvent trap is their internal and external diameter and thread. They also differ in weight. Other than that, these solvent traps are almost identical in functionality.
After looking at the characteristics of these two and their pros and cons, a fair conclusion is that both are great solvent traps. You are assured of high performance and durability regardless of whichever of the two you pick, compared to buying a low-grade 1 2 x 28 fuel filter. 
A high-quality solvent trap kit is essential when cleaning your firearm, which is why it is even more necessary to avoid the 1 2×28 fuel filter. The two traps discussed above are among the best and provide an excellent solution for every maintenance process. If you still have some pressing questions, you can contact our team at Armory Den, and they will assist where they can.
Armory Den is one of the leading suppliers of high-grade solvent trap kits and has been selling them for years.

Read More

10% Off Discount Code! DEN10