Lubricating Your Firearm The Proper Way

Owning a firearm comes with much care and maintenance to keep it in good working shape and everyone safe. One of the ways to achieve this is to lubricate your firearm. Today, we will discuss the best firearm cleaning solution and how best to lubricate your firearm.

Why You Should Clean and Lubricate Your Firearm

A clean and well-maintained firearm is a perfectly functional one that will not only achieve its purpose but ensure everyone using it is safe from certain malfunction-based disasters. Here are some of the reasons why you should clean and lubricate your firearm:
  • To Improve Performance – Lubricating your firearm protects it against wear and corrosion. Well-maintained firearms perform better.
  • For Safety Purposes – Safety is vital to keep in mind when handling firearms. By cleaning the unburnt powder, dirt in the barrel helps to avoid dangerous scenarios.
  • Helps in Protecting your Investment – The proper maintenance of firearms preserves their value. Since firearms are expensive and replacing broken parts tends to be costly, maintaining the firearms by cleaning and lubricating their parts will play a key role in making the best out of your purchase.

Lubricating Your Firearm the Proper Way

Here are some of the most effective tips on cleaning and lubricating your firearm.
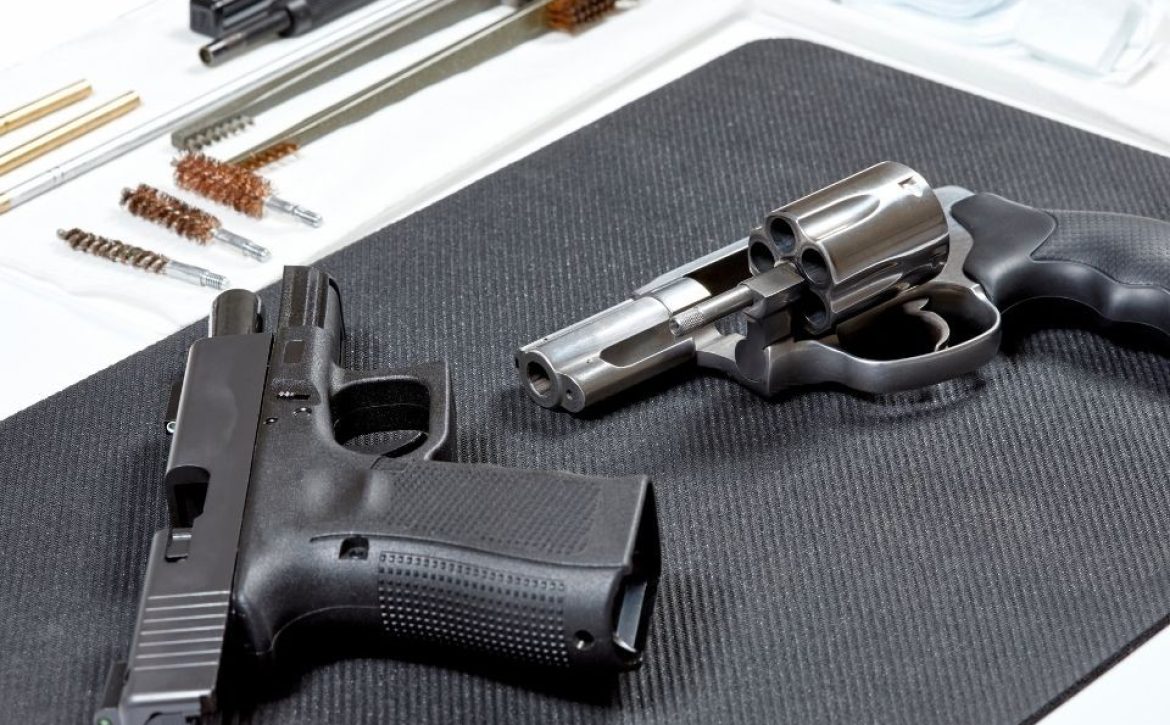
Get a Cleaning Kit

Buy a cleaning kit comprising everything you need. Whether you buy a pre-assembled cleaning kit or assemble the specific components individually, you will need a couple of things to include in your arsenal of cleaning supplies. A fundamental set includes:
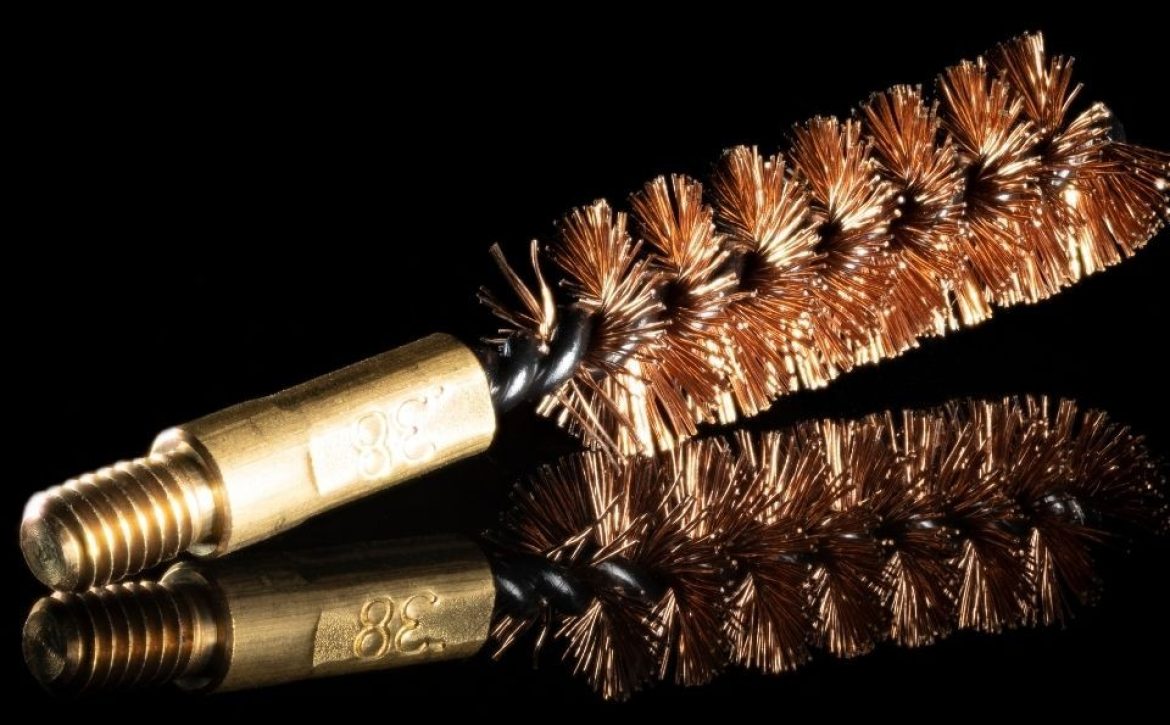
  • A bore brush
  • Patches and a patch holder
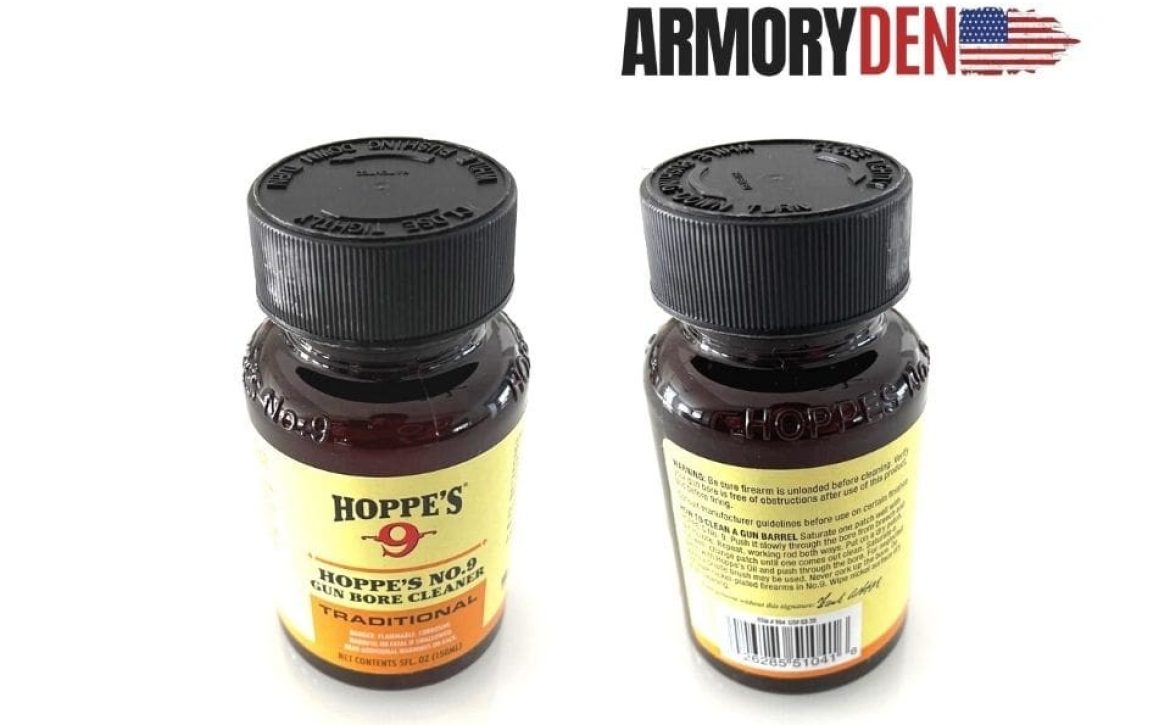
  • Lubricant
  • A Cleaning solvent
  • Flashlight
  • Microfiber cloths for polishing
  • Cotton swabs
  • A cleaning rod
  • A nylon washing brush

Unload Your Firearm

It’s good to take some time to properly unload your firearm every time you remove it to clean it. Sometimes it may still contain the magazine, so always check and remove the round.
After unfolding the chamber, inspect the barrel from back to front. Verify to ensure that no round is left behind, either stuck in the barrel or chamber. You cannot assume you have unloaded your firearm until you inspect the barrel.

Dismantle Your Firearm Following Your Manual Instructions

Confirm with your owner’s manual the proper dissembling or “take-down” instructions to prepare the firearm for cleaning. It will enable you to access all the parts that collect dirt and debris during firing.
Semi-automatic firearms involve removing their vital components when cleaning them. On the other hand, the guide rod, barrel, frame, slides, and magazines will remain intact when cleaning them; you don’t have to dismantle any of those further.
You do not have to disassemble your firearm more than you have to unless it’s for repair purposes.

Clean Your Firearm in a Well-Ventilated Area

Clean your firearm in an open area. A gun cleaning solvent may contain harmful chemicals that are dangerous when inhaled.
Cover your work surface with newspaper, plastic bags, and old towels you have kept for the purpose. Clean your firearms on a dry and bright day to get them cleaned thoroughly.
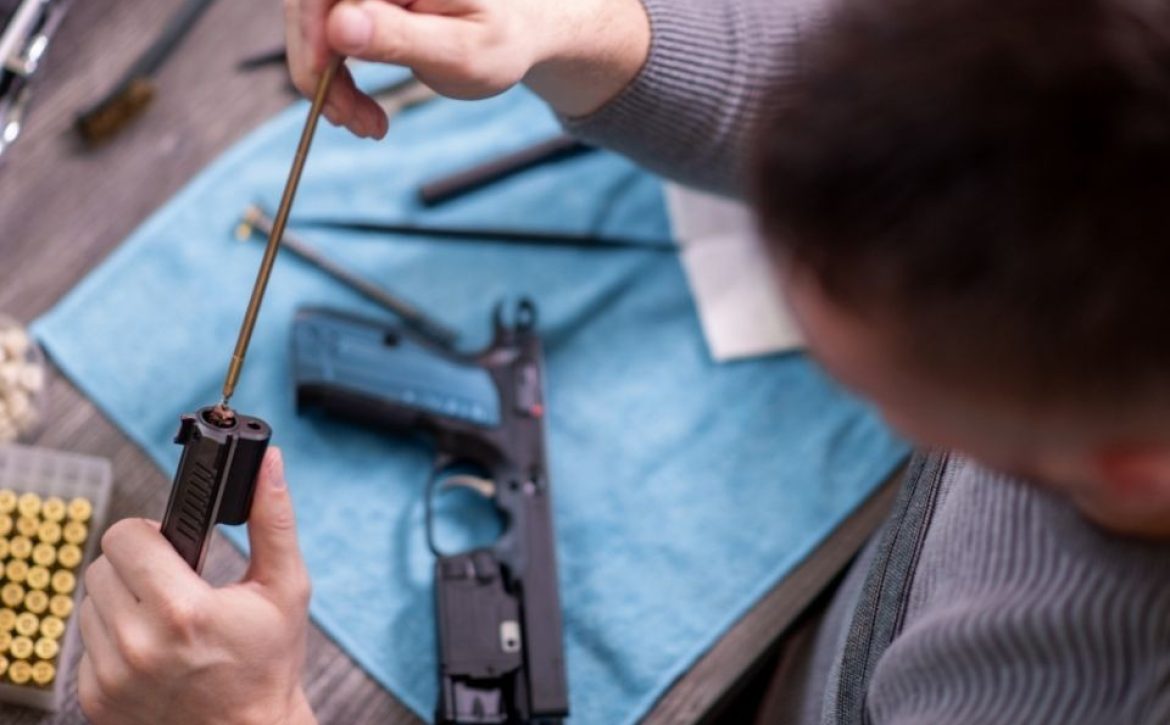
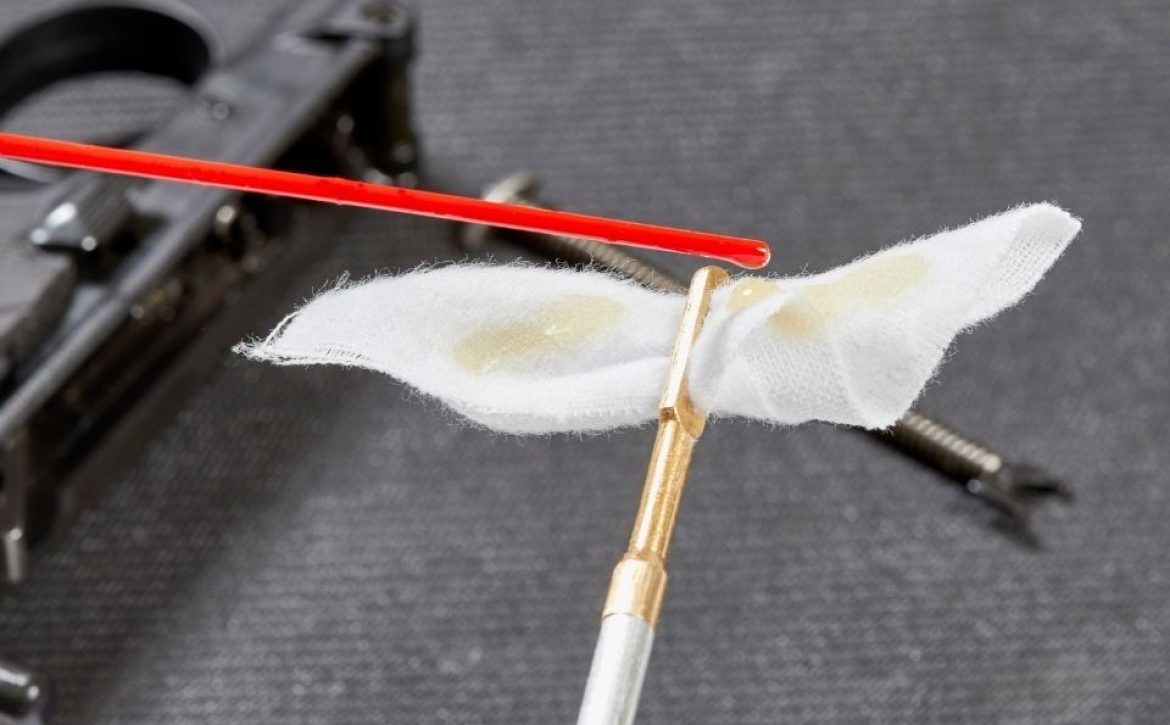
To start the cleaning, wipe out the barrel with a cleaning rod and patches. Soak the bore using the cleaning rod, properly sized cotton patches, and patch holder for your firearm.
Operate from the back of the bore or consider using a muzzle guard. The muzzle guard prevents the cleaning rod from hitting against the muzzle, which may cause your firearm to malfunction.
To properly clean the barrel, squeeze a solvent-soaked patch through the bore until it appears in the other end. Retrieve the patch but avoid pulling it back through, as it will reapply all the dirt you cleaned off.
Alternate the Patches and the Bore Brush to Scrub the Barrel Properly
Retrieve the patch holder and attach the bore brush. Reattach the patch holder and apply solvent-soaked patches over the bore. Take them when they appear through the front. Repeat the procedure until a patch comes out flawless. Use one extra dry patch to inspect any dirt left and dry it out.

Lubricate the Barrel

Put a cotton mop on the cleaning rod. Use a few drops of lubricant and run it through the bore, leaving a thin coating of gun oil on the inner part.
Lastly, use a needle applicator to apply oil at the recommended lubrication points like the outside of the barrel, frame action, and slide assembly. In the case of magazines, do not lubricate them but rather clean them using a cleaning agent or a residue-free solvent.
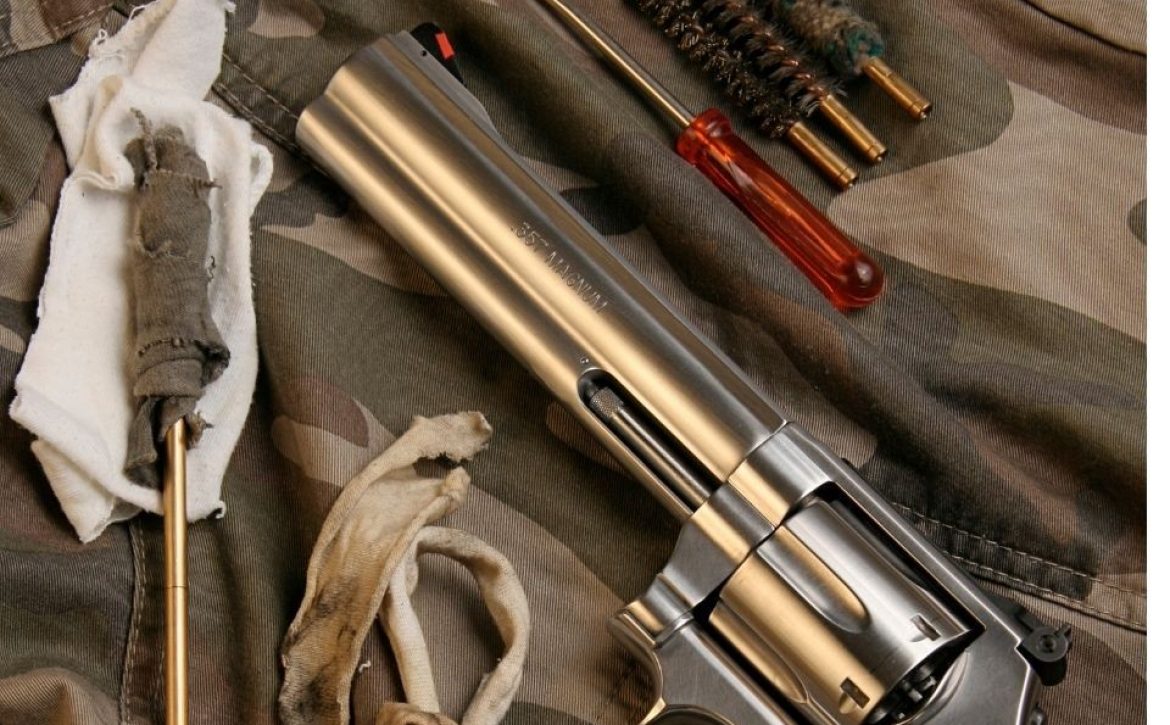
Why You should use a Solvent Trap when Cleaning
Here are the benefits of using a solvent trap during cleaning.
  • A solvent trap is easy to use and attaches to the barrel of your firearm. Also, it catches the cleaning solvent, preventing spills.
  • They are affordable. Cleaning your firearm is easy and takes little time; solvent traps are worth the investment.
  • Solvent traps are safe, reliable, and save you money.

Reassemble Your Firearm and Carry out a Functionality Check

Perform an operational check to ensure that the firearm still operates and adheres to the gun safety procedures given by the manufacturer. Finally, store your firearm properly in a gun safe.

Dangers of Using Too Much Lube

Lubricants are crucial for your firearm as they protect it from corrosion and improve performance. But excess applications of lube can cause some effects. Take a look at some of them:
  • Too much lube on your firearm creates an oily mess that contaminates any surface in contact with your firearm.
  • The excess oil will penetrate inside the firearm leading to malfunctions and attracting dirt.
  • Finally, excess lube can collect dirt, carbon, bits of debris, and unburnt powder. It creates a sticky, thick slime that makes your firearm malfunction.
A clean, lubricated firearm is an outstanding one. As you can see, the process is not that difficult, so take some time to clean and maintain your firearms. Consider using a solvent trap from Armory Den alongside the traditional cleaning methods mentioned above for maximum cleaning results.

Read More

Start Prepping Your Firearms for Hunting Season

With hunting season just around the corner, there can’t be a better time to get your optical mounts and firearms field-ready for an enjoyable adventure. You’ve probably heard it countlessly that failing to plan is planning to fail. Preparing ahead of the hunting season could mean the difference between a successful hunt and a disappointing experience. We’ve outlined five tips to get you organized and make your next expedition a memorable one.

1. Clean Your Firearm

Your firearm has probably been through a lot of corrosion after chilling indoors after the last hunting season. In such a state, it is not suitable for hunting. The carbon buildup in the barrels can affect your aim due to airflow changes in the brake ports. So, if you want to improve your aim in the field, you need to give your firearm a thorough cleaning.
Besides improving shooting accuracy, firearm cleaning is also essential to guarantee safety. So, you would want to clean your firearm to avoid the risk of an accidental discharge. To proceed with the cleaning process, you should obtain the right cleaning supplies from your local retailer and read the manufacturer’s instructions. Armory Den’s solvent trap cleaning kit is a reliable firearm cleaning solution that provides all the cleaning items you need in one place. 
During the cleaning routine, the first thing to do is unload your firearm, including the magazine. Then use a dry bore brush to break up some grime clumps before pushing a solvent-soaked cotton patch through the bore. A common problem you are likely to face during this step is that the guide rod may poke out when the slide is racked and blocked by the solvent trap’s bottom. To overcome this setback, you’d need a muzzle extension device like the ADV2 to provide additional length and flexibility from the piston spring setup. Once you’re done with the bore, wipe the outer parts with a lightly oiled rag. Then assemble the components once more.

2. Sight-In Your Firearm

After cleaning your firearm, the next thing to do is to get on a range and dial it in. Even if you nailed the bullseye on your last hunting trip, the bullet trajectory could have changed due to minor jostling in transport, storage, or the cleaning routine. Such misalignment could result in poor accuracy on the field.
To begin the sight-in procedure, check the screws on the action, sights, scope mounts, and scope rings. They might have become loose during the previous hunting season, so tighten them. The tools you’d need for the sight-in include a firearm rest, spotting scope, staples, screwdriver, and paper targets with a bullseye in the center. Most firearm ranges come with a bore-sighting device called a collimator. If you don’t have one, ask your local vendor. 
When adjusting the sights, zero in the firearm between 1.5 and 3 inches at 100 yards. It’s better to aim for shorter targets like this because it would be challenging to have a clear shooting lane beyond it. Now carefully load a single cartridge and fire the first shot at the bullseye on the target. In the same position, fire two more shots, one at a time. If the shots did not strike the bullseye, you would need to adjust the sights. Then fire another three shots at the target like you’ve done before until the three-shot group is centered on the target.

3. Weatherproof Your Firearm

During your hunting adventure, the weather might not always be on your side, so you should prepare your firearm to resist any unfavorable weather changes.
Oiling your firearm is one of the best things you can do to shield it from rust or corrosion from rainfall. Another thing you would want to do is use some electrical tape to protect the bore of your firearm. It helps to keep the crown and the bore of the firearm free from debris, moisture, or other foreign objects. And if you’re wondering if this would affect your accuracy, it won’t. Muzzle tape has zero effect on the bullet’s trajectory.
Consider getting some hydrophobic binoculars and scopes for your optics if your firearm does not already have that accessory. Hydrophobic optics like that keep water drops away so that they don’t interfere with your sight picture. It’s a huge advantage when hunting in wet snow or rainy conditions.

4. Get a Professional Repair

The condition of your firearm determines the quality and success of your hunting adventure. If your firearm or scope has developed any mechanical problems, consider taking it to a good firearm repair. A cracked part, deformed firing pin, or timing malfunction calls for professional servicing; otherwise, it can quickly result in safety hazards.
Firearm repair can involve long hours, especially if you own an extensive collection. So, the best thing to do is let a professional repairer take care of it. They have special equipment like microscopes that enable them to diagnose your firearm more efficiently. It would also help if you check the manufacturer’s warranty; if it’s still valid, you can get them to fix your firearm at no cost.

5. Practice With Your Firearm

Whether you’re new to shooting or have already mastered the art, it’s essential to get comfortable with your firearm before heading out in search of a big game. A consistent engagement with your firearm at the range will build your skill and confidence.  
Like all other sports, you get better with continuous practice. So consider joining a local shooting range where you can practice shooting live rounds twice or three times a month. If you want to improve your shooting accuracy quickly, try these shooting drills: cartridge in the sight, single hole, and one shot.

Final Thoughts

At Armory Den, we offer top-notch firearm cleaning solutions to help you efficiently clean your firearm and catch solvent in efforts to improve your experience clean more often than not, and enjoy your hunting adventure. Our products include high-grade solvent traps, solvent trap parts, and cleaning accessories. If you have questions about a firearm and its cleaning procedure, we’re happy to help. 
References

  1. Solvent traps cleaning kit: https://armoryden.com/highly-demanded-attachment-ad-m34-muzzle-extension-device/
  2. ADV2: https://armoryden.com/highly-demanded-attachment-ad-m34-muzzle-extension-device/

Read More

What is a Bore Brush, and What is it Used For?

Bore brushes consist of metal twisted or spiraled around strands of tiny hard material like plastic or metal filament. There are bore brushes that are designed like a bore mop. Therefore, instead of pieces of cotton that make up threads, which are tightly fitted together around a rod, they have filaments or threads of metal or plastic.
Maintaining a firearm requires a cleaning solution or a liquid solvent. However, a gun cleaning solution cannot be used standalone. You will need some tools that will help in delivering a firearm cleaning solution like a solvent to any desired part of your firearm. Among this array of tools is a bore brush. What exactly is a bore brush? Think of it as a tool for brushing dirt off a firearm bore. However, you’ll want to know what it’s made up of and how it functions to get the most out of it.

What Materials Are Bore Brushes Made Of?

The bore brush is made of materials like steel, bronze, brass, and nylon. Although bronze and nylon are the common types of bore brush, you will find around. Thus, briefly discussing these major types of bore brushes is necessary.

Nylon Bore Brushes

Nylon bore brushes are made of High-Density Polyethylene (HDPE) which are, in turn, a product of petroleum. HDPE is used in making products like plastic bottles, milk jugs, shampoo bottles, cutting boards, and piping. It has high-impact resistance, and its heat tolerance is high. The nylon brush can either have filaments of plastic attached to a spiraled or blind hole rod.

Alloy Bore Brushes

A bronze bore brush is a metallic substance mainly consisting of copper, a tiny percentage of tin, and a mesh of other metallic substances. A bore brush can also be made of brass and steel. Bronze, brass and steel are alloys; they are a combination of metallic elements. Bronze and brass are common because they are primarily copper; while brass has a considerable percentage of tin, bronze has zinc. However, steel is an alloy of iron and carbon.

What Is A Bore Brush Used For?

It is often a common saying that maintaining a firearm requires four steps: cleaning, brushing, drying, and oiling. While gun cleaning solutions like the bore mop are used for cleaning, drying, and oiling, the bore brush is used for brushing. Irrespective of the types of bore brushes, they are used for removing tough stains.
However, you need to be cautious of the type of bore brushes you choose. The type of gun cleaning solution will determine the type of bore brush you should work with. Likewise, the material of your firearm also determines the type of brush to use.

What Is A Nylon Brush Used For?

Nylon brushes are usually used with a firearm cleaning solution that removes copper. The logic is simple; the copper remover will react with brass or bronze bore brushes, which are primarily made of copper. It will chemically react with the bristles of the brushes. Therefore, if you need to remove copper build-ups in your firearm bore, a nylon bore brush might be the best choice for you. It will prevent the scratching of bore surface.

What Are Bronze And Brass Brushes Used For?

Nylon bore brushes are highly impact-resistant. Nevertheless, they are not strong enough to remove carbon build-ups. Carbon is one of the strongest materials. Bronze and brass bore brushes can be effectively used with solvents that remove the powder, lead, metal fouling, rust, and carbon debris. However, the higher percentage of copper in both brass and bronze makes them unsuitable for solvents that remove copper fouling.

What Are Steel Brushes Used For?

A steel bore brush might be the best cleaning tool for removing the toughest debris like carbon or metal. However, there is a high tendency for steel bristles abrading the bore’s lining. This might reduce accuracy and eventually render the barrel useless.

How to Use Bore Brushes

Choose The Appropriate Firearm Cleaning Solution

Bore brushes are similar to other cleaning tools like a bore mop. First, you need an appropriate gun cleaning solution to determine what type of bore brush you will need. Spray the bore with your preferred gun cleaning solution.

Leave The Solution To Dissolve Build-ups

Leave it for a few minutes. Standardized solvents or oils come with instructions on how many minutes the solution should stay before brushing or cleaning. After the stipulated time has elapsed, the solution will have softened and dissolved stubborn build-ups or fouling.

Insert A Bore Guide

Insert a bore guide into your firearm barrel. This will guide the bore brush and prevent its rod from abrading the bore’s lining. The bore guide will also ensure that the brush does not reach places in your firearm that it is not designed to reach. Since the bore guide directs the bore brush, it keeps its rod straight.

Run The Brush Through The Bore

Once you place the bore guide properly, gently insert the brush through the muzzle until it comes out at the breech through the bore guide. Ensure that the brush sits firmly on the chamber or chambers of your firearm. Attach a swab or patch at the tip end of the brush. Gently run the brush through the bore. If the swab is heavily stained, change it at each run-through; repeat this process until the swab appears clean.
A firearm bore brush is very useful in the removal of stubborn stains. However, this cannot be possible without applying a good quality gun cleaning solution.
Armory Den offers a variety of gun cleaning solutions for your firearm cleaning needs, including solvent trap kits made of high-grade quality materials, a portable firearm cleaning kit, and gun cleaning solvent, among others. Visit armoryden.com for the best deals on gun cleaning solutions!
References

  1. https://www.shooting-school.org/how-to-use-bore-brush
  2. https://otistec.com/bloghow-to-choose-the-best-bore-brush-for-the-job/
  3. https://goodblokes.nz/bore-brushes-bronze-nylon/
  4. https://www.amazon.com/Tipton-Best-Bore-Brush-Pack/dp/B00M1WM044#:~:text=for%20your%20firearms.-,Each%20brush%20contains%20the%20maximum%20number%20of%20bristles%20that%20can,the%20coupler%20in%20the%20barrel.
  5. https://www.wikihow.com/Clean-a-Gun
  6. https://www.gordonbrush.com/brushes/bore-brushes

Read More

The Proper Way Of Cleaning and Maintaining Your Glock Firearm

Whether you enjoy shooting as a hobby or profession, maintenance is essential for owning a firearm. Regular, thorough cleaning will keep your firearm functional for much longer. Besides increasing its longevity, cleaning your firearm helps to improve accuracy and ensure safety.
Today, we will explore how to properly clean a Glock, including an ideal maintenance schedule and the best cleaning accessories you’ll need.

Before You Start Cleaning Read the Owner's Manual

Read the manufacturer’s instructions to familiarize yourself with the inner mechanisms of your firearm. It will help you clean it more easily. Brand new Glocks would typically come with a printed manual in the packaging, but if you’ve lost your copy, you can request one from the original manufacturer.

Prepare Your Cleaning Accessories and Work Area

Find a well-lit, ventilated space in your home to set up your workstation. The lubricating oil and cleaning solvent may contain hazardous chemicals, so you want an open space to avoid inhaling it. Also, you need a cleaning kit readily available at your workstation.
Amory Den offers cleaning kits, including everything you need for the procedure: a cleaning brush, lubricating oil, solvent trap kits, and muzzle extensions. Spread out these items on a spacious table or mat.

Wear Safety Equipment

You need to put on safety glasses to protect your eyes from spring-loaded carbon residue and the toxic fumes that may come from the solvent and lubricant. You’d also need to have disposable gloves on to protect your skin from potentially harmful cleaning chemicals.

How to Clean Your Glock Firearm

1. Take the Glock apart

  • Point it away in a safe direction and release the magazine.
  • Rack the slide several times to ensure no ammunition is left in the chamber.
  • Then pull the slide back and pull down its lock.
  • Remove the spring and the barrel from the slide.

2. Clean the Barrel

  • Attach a brush to the rod and run it through the chamber to break up carbon buildup.
  • Using the rod, run a solvent-soaked patch through the chamber and bore of the barrel.
  • Soak another patch in lubricating oil and run it over the external section.

3. Clean the Frame, The Slide, And The Recoil Spring

  • Use a clean brush to remove carbon and dirt from the exterior of the frame, the magazine interior, the rails, the spring trigger bar, and everything in between.
  • Soak a rag in the solvent and clean these parts again.

4. Apply Lubricating Oil

  • Apply a drop of lubricant to the end of the trigger bar, the guide rod, the back ends of the slide rail cuts, and the square shelf where the barrel’s hood locks up into the slide.
  • Use a patch to distribute the oil drops evenly around these parts.

5. Reassemble and Test

  • Reassemble your Glock by inserting the barrel, the recoil spring, and the slider back onto the frame.
  • Without loading the magazine, point the Glock in a safe direction and pull the trigger. Release the trigger and feel it reset.
  • If anything feels out of place, consult the owner’s manual to identify the problem.

How Often Should I Clean My Glock Firearm?

  • Every firearm is unique, and your maintenance routine will depend on how frequently you use it.

When it's Brand New

Ideally, if your Glock is just right out of the box, you should clean it up before firing it for the first time. You have to remove all factory grease and oils from the barrel. The original lubricant is not for functionality; rather, it’s meant to protect the firearm while it’s stored.

Everyday Carry

If you use your Glock regularly, we recommend that you do a light cleaning after every shooting session or deep cleaning at least once a week.

Occasional Shooter

Perhaps you acquired your firearm for home defense and didn’t use it much. In that case, you can settle for a dry wipe and light oiling once every six months. But note that this maintenance routine keeps rust at bay and not for functionality.

Exposed to Moisture & Dirt

Moisture is the enemy of working firearms, so if your piece has been exposed to rain, fog, or snow, you need to wipe it off, clean and lubricate it immediately. The same goes for exposure to dust and dirt.

Is it Bad to Clean Your Glock Firearm Too Much?

“Too much of everything is bad” is an adage that emphasizes moderation in anything, including firearm cleaning. Over-cleaning will not damage your Glock, but heavy lubrication can quickly become a problem if it gets into the firing pin channel. It will ease up friction so much that a light tap could cause a misfire.
Additionally, excess lubricant in your firearm can easily combine with carbon fouling and dirt from the air to form a grit, and you’ll need to take it out before it gets messy. There’s really no need to overdo it.

Cleaning Your Glock Firearm Can Be A Lot Easier

At Armory Den, we understand the importance of keeping your firearms clean, and we want to help you keep them that way as conveniently as possible. We’ve noticed two challenges firearm owners encounter when cleaning their pieces through traditional methods. The first one is that fouling residue and grit often create a mess on the workstation. The second is when executing a cursory barrel clean with a flexible cleaning brush, Glocks, like many other striker fire and other Browning style pistols, have an overextended guide rod that pokes out when the slide is racked and may be blocked by the bottom of the solvent trap. So this blocks the slide from moving backwards into an open and locked position.
Consider using a solvent trap with a muzzle extension device to address these issues to streamline the Glock cleaning process. Solvent traps help to catch and trap the cleaning solvent for easy disposal. That way, your workbench doesn’t get messy with permanent stains with routine or rigorous firearms cleaning.
What about muzzle extension devices? How can they help you overcome the guide-rod issue? A muzzle extension device like the ADV1 or ADV2 supports the cleaning process by providing additional length so the solvent trap is not blocked by the guide rod when the slide is racked back for cleaning. This solution provides flexibility with Glocks and browning style firearms during routine sessions. With Armory Den, you can visit to our product pages where you will find product instructions that provide detailed instructions explaining the cleaning process for these products. 
References

  1. 5 Reasons Why Cleaning Your Handgun Is Important: https://keystoneshootingcenter.com/blog/5-reasons-why-cleaning-your-handgun-is-important
  2. How to Disassemble a Glock: https://www.google.com/amp/s/www.wikihow.com/Disassemble-a-Glock%3famp=1
  3. Gun Maintenance Tips: How to Clean a Glock 17: https://www.hoppes.com/ho-blog-educational-videos/ho-blog-how-to-clean-glock-17.html
  4. Maintaining Your Glock Pistol: https://www.police1.com/police-products/firearms/articles/maintaining-your-glock-pistol-8cMJtI74CvqU4tC
Notice: Please be advised that this article is for information purposes only and Armory Den, Inc., Armory Den, and/or Armoryden.com, does not accept liability for any negligence, injury, death or other personal or environmental consequences that occur from the sourced and unsourced information in this article. 

Read More

The Safe And Proper Way Of Storing Your Firearms

According to Everytown Research, an independent movement working to end firearm violence, hundreds of children in the US gain access to firearms and unintentionally shoot themselves or someone else. Most reported occurrences stem from a negligent firearm storage culture is the main reason these accidents occur.
Firearms are dangerous, and every firearm owner is responsible for keeping them out of children’s reach. Besides the fact that you’re trying to protect inexperienced users from possible harm, storing your firearm properly ensures that it functions smoothly and lasts long. If stored correctly, firearms of even modest quality can last for 100 years or more.
Today, we will discuss several firearm storage solutions, the best conditions to store your firearm, and how you can determine the right safe storage solution for everyone.

What Are The Best Storage Conditions For My Firearm?

Before discussing the various firearm storage solutions, let’s talk about the best conditions required to keep your piece in the best shape throughout the storage period.
Dry
The National Rifle Association recommends storing your firearm within a 30% – 50% relative humidity range. One simple way to meet this requirement is to introduce silica gel packets and silica gel dehumidifiers to the firearm storage compartment. Over time they’ll expire, so you will be required to replace them.
Moderate Temperatures
According to the NRA, 70 degrees Fahrenheit is the optimal temperature to store firearms. If the safe is too hot or cold, it can degrade plastic and rubber components, like magazines, pistol grips, plastic stocks, or polymer handgun frames. You can use a temperature monitor to check that the heat is moderated.
Airtight
Try storing your firearms in an airtight compartment to reduce their susceptibility to oxidation. If your firearm is exposed to air for long enough, it will result in rust, corrosion, and pitting of metal alloys. To limit the oxidative effect of air on your firearm, go for the thick steel wall safes, or consider using vacuum seal bags.
Out of Sunlight
Exposing your firearm to sunlight can cause it to fade quickly. UV light can easily ruin plastic, wood, and anodized or painted finishes. Thus, proper firearm storage should be in a light-deprived enclosure.

Short-Term Firearm Storage Options

Trigger Locks
A trigger lock is the most straightforward way of restricting firearm access to unauthorized users. These devices usually come with three locking mechanisms: a keyed, combination, or biometric lock. A trigger lock typically consists of a two-piece locking mechanism that fits over the trigger guard. The cylinder that fits behind the trigger restricts any backward movement so that it fails to pull and fire.
These locks will keep people from using your firearm unless they know the combination. Trigger locks are inexpensive. Nowadays, some manufacturers even include it in your firearm packaging, so if you’re lucky, you may get one for free. Although storing your firearm with this device will not protect it from humidity and extreme temperatures, nevertheless, it allows reasonably quick access to the firearm if needed.
Portable Lock Box
A portable lockbox is another convenient short-term storage option for firearm owners. As the name implies, this storage compartment is excellent for traveling. You can easily fit it in a suitcase or under a car seat for concealed use. The box is usually made of reinforced high-tensile steel for incredible strength and toughness. The locking mechanism can vary from a keyed lock to a programmable biometric fingerprint reader. Regardless of the lock type your box features, you’ll love the fact that it can protect your firearm from external conditions while offering quick access to the owner.
Firearm Cases
There are two main types of firearm cases to consider when thinking of safe storage. These are the soft case and hard case. The soft case is usually made from lightweight, water-resistant material like ballistic nylon. It’s almost useless for protecting your firearm from fire, but it keeps moisture away pretty well. It can serve as an additional layer of protection when stored in a heavy-duty safe. On the other hand, a hard firearm case often features modern polymer construction, which can protect the firearm from moisture, oxidation, and a little bit of physical stress.

Long-Term Firearm Storage Options

Stationary Lockbox
The stationary lockbox is like a bigger version of the portable lockbox. The key difference is that it comes with an ultra-sturdy security cable that can quickly attach to stationary objects and become immovable. This feature affords more protection against burglary than the portable version. Additionally, its high-tensile steel provides a considerable level of fire protection.
Locking Security Cabinets
If you’ve got multiple firearms and a spacious area in your home, you can give this storage device a try. It’s bulky and solid on the outside, spacious and padded inside. Small locking security cabinets can accommodate up to eight firearms, while bigger models like the Stack-On GCB-18-C can hold up to 18 pieces and still have additional space for other accessories. Its heavy-duty construction offers protection from burglary and perfect insulation from fires. These devices have multiple locking mechanisms, including a 3-point locking system, a key-coded lock, and a double-bitted lock.
Firearm Safe
A firearm safe is the safest storage option ever. However, not everyone uses this device to store their firearm because it can be pretty expensive. Nevertheless, a good firearm safe is worth every penny. Its thick steel construction provides the ultimate protection from theft and fire outbreaks. The most important things to consider when purchasing a firearm safe are the space in your home, the space capacity of the safe, and the regulatory standards in your state.
Armory Den is passionate about helping you improve the safety, reliability, and overall performance of your firearm. Before stocking up your firearm for storage, you’d need to clean it up and lubricate it to stay in good shape throughout the storage period. Contact us today if you have any questions concerning firearm maintenance.
References

  1. Preventable Tragedies: https://everytownresearch.org/report/notanaccident/
  2. How to Safely Store Guns and Ammunition: https://theprovidentprepper.org/how-to-safely-store-guns-and-ammunition/
  3. 6 Ways To Safely Store Your Firearms: https://www.nrafamily.org/articles/2021/10/13/6-ways-to-safely-store-your-firearms
Notice: Please be advised that this article is for information purposes only and Armory Den, Inc., Armory Den, and/or Armoryden.com, does not accept liability for any negligence, injury, death or other personal or environmental consequences that occur from the sourced and unsourced information in this article. 

Read More

A Complete Guide to Gun Cleaning Supplies for the Newbie

An essential element of owning an arsenal is ensuring that all parts are always in the best working condition. Whether this means evaluating the condition of the arsenal or updating some of the tools, maintenance is crucial. Undoubtedly, the most crucial thing in an entire arsenal is a firearm, primarily because, at some point, your life may be dependent on it.
Using them on rotation will help extend their lives if you own several firearms. However, ensuring that each piece is maintained correctly is the most important thing. In the past, most first-time firearm buyers grew up around them, usually learning how to shoot from their fathers, uncles, or grandfathers. This is no longer the case as more and more people are applying to become licensed holders. Nowadays, your local firearms store clerk is unlikely to assume that you know everything about firearms.
According to the NSSF, there were nearly 5 million new owners in 2020 in the USA. Statistically, in addition to existing owners, it put the number of firearms per household at 3.37. Because of this, it is now apparent that a good number of new firearm holders lack the necessary knowledge and tools for proper maintenance.

Why is Proper Maintenance Necessary?

Your firearm is an investment. It does not matter if you are purchasing it brand new from the manufacturer, second-hand, or getting a hand-me-down piece. Most cars lose about twenty percent of their original value once driven out of the lot. However, a firearm can retain its value even for 100 years if it is well-maintained. Knowing how to clean a weapon properly is easier said than done, and you need the proper knowledge on how to go about it.
Some people enjoy the maintenance process, while others find it a little daunting. If you have trouble keeping up with the process, having a routine will help. Apart from helping your weapon retain its form over many years, proper maintenance is crucial for safety. Firearms that are not well-maintained tend to malfunction, which could damage or pose a danger to users’ lives.

Essential Firearm Cleaning Supplies

The first cleaning agent that you need is a gun cleaning solution. It helps remove built-up dirt, carbon, and foreign particles from your firearm. At times the cleaning solvent will be in the form of an aerosol, but this is not always the case. A degreasing solution helps to remove any excess grease that a firearm has from the manufacturer, but you do not need it for general maintenance purposes.

A Cleaning Mat

Firearm cleaning mats are made in both short and long firearm configurations. A cleaning mat can be made from various materials, including; leather, waxed canvas, and wool. Their purpose is to provide ample area to disassemble the firearm and clean it. Getting a cleaning mat is essential because it will assist in protecting the firearm from being scratched by the surfaces as you do your cleaning.
At the same time, it helps to contain the oils and grimes from the weapon during cleaning. A well-made cleaning mat will usually have multiple pouches where you can conveniently place the cleaning supplies. This makes it more convenient as you will not constantly have to move around, picking up the cleaning supplies during the process.

Firearm Grease/Oil

Firearm grease is essential as it provides an extra layer of lubrication for your weapon. It is used in areas where metal parts of the firearm make contact. For instance, you could use it on the slides of short firearms or the hinge points of break-open long firearms. Some types of firearm lubricants even provide corrosion and rust prevention. Using grease routinely will keep the moving parts running smoothly.

A Firearm Parts Tray

Everyone needs a tray to hold the small parts of their firearm once they have disassembled it. Little pieces such as firing pins and bolts are easy to lose due to their size. A tray will help you store and organize them as you work on other parts of your firearm.

Bore Snake

This cleaning tool removes the main buildup in your firearm. It is necessary to note that this tool is not used during fine cleaning. However, you can easily carry it to the range to quickly clean the bore. You do not need to field strip your firearm to use a bore snake.

Cleaning Rod

This cleaning tool is used with various attachments, including wire brushes, slotted tips, and the bore jag. Thanks to the rod, these attachments can efficiently run the entire length of a weapon’s bore during the cleaning process.

A Brush and Pick Set

You can use various brushes to break up the grime and carbon buildup in your firearm before wiping it down. You could also use the picks to pick, scrape, prod, and poke hard-to-reach parts. Picks can also work in places where carbon buildup is just too much to wipe off easily. Their tips are made of soft brass to avoid scratching the firearm.

Cleaning Patches

Cleaning patches are typically made from cotton flannel, and they come in round or square shapes. Depending on the company, they are usually packaged in groups of 500 to 1000. They are sold in bulk because firearm holders need to go through many patches during a single cleaning process. They are also inexpensive.

Firearm Cleaning Cloth

It is best to have a soft, absorbent microfiber cloth during maintenance. A soft, washable, reusable chamois will not damage the exterior finish during cleaning.

Firearm Vice

This will come in handy when you are not carrying out extensive cleaning, which often necessitates field stripping the firearm. A firearm vice offers adequate access during cleaning while freeing both of your hands. It is, however, usually reserved for individuals engaging in extensive smithing.
Regarding the traditional steps and supplies mentioned in the guide above, it may serve readers best to consider using a solvent trap for optimal results and a streamlined, mess-free cleaning session. Solvent traps, such as the ones offered by Armory Den, can benefit your firearm cleaning process in many ways. Most notably, a solvent trap cleaning kit can help minimize the environmental impact through trapping and allowing for recycling and reuse of solvents. They also help users reduce their cleaning mess. There are many other benefits of using a solvent trap alongside traditional methods and tools – one thing is for sure, the benefits of firearm cleaning with a solvent trap far outweigh the cost!
Notice: Please be advised that this article is for information purposes only and Armory Den, Inc., Armory Den, and/or Armoryden.com, does not accept liability for any negligence, injury, death or other personal or environmental consequences that occur from the sourced and unsourced information in this article. 

Read More

What are Gun Cleaning Patches and How to Use Them?

After getting a new firearm, one might be unsure of what they need to do before taking it out on the range. Whether you have just gotten a brand-new firearm or gotten it second-hand, it is crucial to ensure that it is in the best condition before firing it. Failure to clean your firearm could result in several different malfunctions, which you certainly want to avoid.
Proper maintenance requires having the correct maintenance and cleaning gear. Apart from the gun cleaning solution, lubricating oil, and other cleaning supplies, cleaning patches are integral to every firearm maintenance routine. 

What are Cleaning Patches

These are ultra-absorbent patches usually made from cotton or synthetic material. They are uniformly pre-cut in either square or round shapes. Apart from being used independently for wiping, they are attached to a loop during cleaning. Most firearm holders prefer them over cleaning cloths because they do not get caught between firearm parts as the latter often does. Cleaning patches come in various sizes and are inexpensive.
They are often sold in bulk because an owner will go through several patches during maintenance. You can use them with cleaning solvents or oils to ensure that the weapon is properly maintained.

How to use Cleaning Patches

If you have just bought your firearm cleaning kit and have no idea where to start, the most important thing to remember is that firearms differ in some ways. That is why it is vital to go through the owner’s manual. Generally, you will need more than just cleaning patches during maintenance.
Cleaning patches are always white, and this is ideal because you will see the change in color as the patches pass through the inner and outer parts of your firearm. One must use several of these until their firearm is thoroughly cleaned.

How to Clean the Firearm

Firearms need to be cleaned regularly. Even if yours is brand new from the manufacturer, you will still need to do so because they are usually packaged with some sticky oil and grease to prevent rusting while stored. Even if they remain on the shelves for several months or years, it keeps the firearms in excellent condition. Once you purchase, it is advisable to remove this grease before use. Afterward, you are supposed to lubricate the firearm before storage. Here are the essential items you will need when cleaning with cleaning patches:
  • A cleaning rod
  • Gloves
  • Cleaning patches
  • A loop
  • A firearm cleaning lubricant
  • A cleaning brush
Once you have these six items, here are the vital steps before beginning the thorough maintenance process.

Step 1: Wear Safety Gloves

It is crucial to have your safety gloves on to protect your hands. Wearing gloves prevents unnecessary fingerprints and natural oils from getting stuck on a firearm’s exterior.

Step 2: Unload the Firearm

These steps might seem evident to owners that follow them. However, you will be surprised at the number of people that accidentally shoot themselves with their weapons because they forgot to unload them. Apart from unloading, ensure that you clean the bullets and magazines. It prevents your gun from jamming afterward.

Step 3: Disassemble

This step is crucial since it might be a challenge assembling it afterward. Be sure to read through the manual before you disassemble your firearm. You can also watch tutorial videos on YouTube.

How to Optimally use the Cleaning Patches as a Firearm Owner

As mentioned before, cleaning patches are very affordable and often sold in bulk. It would be best to purchase several because you might need about 20 during a single maintenance session. Apart from wiping, they are also installed on a jag. The latter is used instead of ordinary sticks because the patch might easily slip off during maintenance. If this happens, it would be challenging to take it out using a stick.
Once attached to the jag, it is attached to a long or shorter cleaning rod, depending on the firearm. You should secure the patch onto the loop by first passing a needle through a hole in the patch. The next step would be holding it from the sides and passing the cloth through it. Lastly, pull the patch upwards to tighten it firmly.

The Most Recommended Cleaning Patches You Should Use?

  • 17 cal, 223 cal, and 22 cal – 2-inch cleaning patches.
  • 270 cal and 234 – 25 cal – 3-inch cleaning patches from outside.
  • 9mm, 30-50 cal, and 7.62 mm – 3-inch cleaning patches inside.
Cleaning steps to follow using cleaning patches
  • Ensure that you choose the right cleaning patch for the firearm.
  • Attach your patches onto the needle as explained above.
  • Attach this needle to the cleaning rod.
  • Clean the firearm thoroughly using the patches both inside and out.
  • Use a cleaning solvent with the patches if you need to.
  • Run a dry patch through the firearm to see whether it is thoroughly cleaned. This step also ensures that the used solvent is removed.
  • If using high-quality patches, you will go through about 7.
Storage Note: An ancillary benefit of cleaning with a solvent trap 
Companies such as Armory Den offer solvent trap cleaning kits, with a primary intended use being what the name implies: firearms cleaning. There is an additional or ancillary use that many solvent traps can be used for, a use that makes the cleaning process more streamlined: storage or dry storage. Dry Storage Cups need not only be used to trap or compartmentalize solvents, such as CLP Oils and Bore Cleaning Solutions, but they serve as great storage facilities for small cleaning supplies, such. as cleaning patches. Cleaning patches, small brushes, different types of solvents (i.e. CLP Lubrication Oils and Bore Cleaning Solutions), among other small cleaning related items that fit, can be simultaneously stored in different “dry storage cup” compartments and deployed during cleaning sessions!
Cleaning patches are an essential part of the maintenance process, and one should never carry out any maintenance work without them. Regarding the gun patch recommendations mentioned above, it is worth mentioning the use of a solvent trap, such as the one offered by Armory Den. Not only are solvent traps great tools to allow for an efficient, streamlined economical, and eco-friendly cleaning solution, but they have a secondary use as cleaning supply storage and transport. Cleaning patches and other small cleaning brushes can be stored in solvent traps storage cups and deployed during cleaning sessions. Solvent traps can also be threaded during transport to the end of a firearm, so everything is ready to go when needed.

Read More

The Proper Way of Removing Rust from Your Firearm

Rust not only degrades your firearms physically, but it also poses several performance and safety issues. It is inevitable because firearms are made of metal and are bound to be in contact with various types of liquids. Rust develops in firearms because certain ammunition contains corrosive chemicals that contain salts like copper and lead. When metal mixes with salt and humidity, it can accelerate corrosion and rust, especially if you don’t lubricate your firearms properly.
Sweat is another major cause of rust as it contains all the favorable elements for rusting and corrosion in a firearm. Whether it is sweat, humidity, or chemical solvents used to clean a firearm causing the rust, you have no control over how rust gets into your firearm. However, you can remove it effectively and efficiently. We’ll have a look at how to effectively remove rust from a firearm and maintain excellent performance over a long period.

What Happens When Firearms Get Rusty?

Rust deteriorates your firearms and makes them look old and unattractive. It also poses several performance and safety concerns, risking your life and those around you. The drag on rough rusty surfaces increases friction and pressure while operating your firearm, rendering it unsafe to shoot.
After shooting a cartridge, the firearm’s system must extract it and eject it. A dirty, rusty, or corroded firearm may not discharge the used cartridge. You then load a firearm with a live round and shove it into the base of the ejected cartridge, potentially causing it to explode.

The Proper Way of Removing Rust from Your Firearm

Sadly, most firearm owners start worrying about rust after it’s a little late rather than preventing it in the first place. There are a few proven ways to get rid of rust from your firearm without damaging it. Coupled with proper storage, here is a step-by-step guide to properly rid your firearm of rust back to that good as new state.

1. Take Your Firearm Apart

Firearms have many parts. Sometimes the inner parts catch rust and need cleaning as well. So the first step to properly ridding your firearm of rust is to separate its parts to get proper access to the rusty areas. You should also ensure that you unload your firearm to avoid accidents. Taking the firearm apart will ensure zero chances of safety hazards.

2. Remove Oxidation

Removing oxidation is critical to a rust-free firearm without destroying the blue finish. You can achieve this with readily available products like vinegar and baking soda. If you are dealing with a small patch of rust, you can spray the part or submerge it in vinegar for about half an hour. The bigger the rust patch, the longer the soaking time. This process can get rid of the rust completely. You can remove the parts and scrub with an abrasive material like sandpaper or steel wool, then rinse in water.

3. Clean Using a Recommended Firearm Cleaning Solution or Oil

Sometimes the rust patch won’t come out easily, so you need to go all the way with a cleaning solvent and firearm oil.
Begin by generously applying a layer of light firearm oil to the rusted areas and working it into the nooks and crannies to address any oxidized regions. Allow the oil to sit for a few minutes to reduce the rust’s grip on the surface, which will improve the oil-rust contact. The rust will loosen its grip on the firearm as a result. Then, wipe the surface with a cotton cloth. 
We also recommend using WD-40 to remove rust from your firearm because of its moisture displacement and rust-preventing properties. This method is quite straightforward. Place the firearm on a flat surface. Spray the WD-40 solution on the rusted region. Allow the solution to sit on the rust for 24 hours before re-spraying it. Wipe the firearm’s surface with a rag or napkin, and it’s as good as new.

4. Scrub It

Choose an abrasive tool like a toothbrush or a steel wool pad to work the oil and remove the rust. Then, using steel wool and firearm cleaner, lightly rub the rusted area. After some time, wipe it with napkins and properly inspect it for any more rust. Try not to apply too much pressure to avoid ruining the firearm’s protective finish.
If the rust persists, repeat the process until the firearm is rust-free.

5. Rinse Your Firearm

After all the cleaning is over, rinse the firearm parts in warm water to remove all the dirt. Then, get your firearm lubricants and thoroughly oil the parts to avoid exposing the bare metal to the elements. This step is crucial because rust ruins the firearm’s bluing finish. Leaving your firearm bare will still put it at risk of rusting even faster because of all the scrubbing you did when cleaning it.

Preventative Measures to Protect Your Firearm from Rust

Some of the most effective preventive measures to protect your firearm from rust include:

Regular Cleaning

If you’re going to the range with corrosive ammunition, make sure to disassemble and flush your firearm with warm water every time. This will remove the salts that would cause your firearm to corrode and rust. Before putting it away, make sure it has completely dried.
Regular cleaning of the firearm helps remove any corrosive compounds that may have settled inside it and aren’t easy to remove. Many firearm cleaning kits are available for you to help get the job done properly.

Lubrication

Oiling your firearm is the greatest way to avoid oxidation. It prevents water from accumulating on the surface and hence slowing down the rusting process.

Proper Storage

Keeping your firearm in a clean, dry case can protect it from moisture, grime, and corrosive elements that might cause it to rust. Find a protective firearm case with a watertight design to help prevent moisture from seeping in.
While following the above step-by-step process of removing rust from your firearms, you should consider using a solvent trap for the best dirt trapping results. Armory Den’s solvent traps are useful for catching lubes, bore cleaners, and other solvents, and for catching rust debris when cleaning your firearm. This will help you avoid rusting on your firearms and reduce the cost of maintenance.
Notice: Please be advised that this article is for information purposes only and Armory Den, Inc., Armory Den, and/or Armoryden.com, does not accept liability for any negligence, injury, death or other personal or environmental consequences that occur from the sourced and unsourced information in this article. 

Read More

Gun Cleaning Solutions – The best Remedy to remove gunpowder residue

What is a Firearm Cleaning Solution?

The cleaning solution for your firearm is synonymously called firearm cleaning solvent. In comparison, the solvent is the most commonly used firearm cleaning solution; however, there are other solutions like home remedies and Ultrasonic Firearm Cleaners as well.   In order to get a better understanding of the differences, we have to look at what residue does to your firearm.

What does Gunpowder (Propellant) residue do to your firearm?

There is no way to discharge your firearm without leaving behind some residues. Your firearm needs to produce gases hot enough to propel a bullet (projectile) out of its barrel at every discharge. However, the temperature must not be too high, so the barrel will not explode. That is why the invention of black powder, the earliest version of gunpowder (Propellant), was revolutionary. Nevertheless, the black powder will not expel the projectile without leaving behind a vast sum of smoke. Therefore, various versions of smokeless propellants were invented to solve the smoky discharge from the black powder.
Whatever version of propellants you use in your firearm, there will be residue after every discharge. Depending on the chemical components of the powder, the residue could contain oxidizing agents which damage the quality of metal in your firearm. Irrespective of the propellants you use, their residue is harmful to your health and could damage your firearm. 
For instance, nitro-glycerine is one of the significant compounds in today’s smokeless propellants; This compound could lead to bloating, dizziness, and difficulty in breathing. The propellant residue could also contain the lead dust, leading to brain damage and high blood pressure. Also, the potassium nitrate in some propellants is a strong oxidizer; therefore, it causes the metallic parts of your firearm to rust.

Solvent as a Firearm Cleaning Solution

A solvent is generally used in the cleaning routine of a firearm. Ideally, a solvent is any solution that can react with residue without changing its chemical compositions.
Nevertheless, some solvent solutions are highly flammable and can act as irritants to your eyes and skin. Therefore, ensure that you use solvents specifically designed for cleaning firearms. Solvent solutions like Hoppe’s No. 9 contain a formula that prevents the rusting of metallic parts in your firearm. A bottle of solvent comes in different sizes. Available on Armory Den’s store, a 5 oz bottle of solvent could be as low as $10! For easier cleaning, you can also use solvent trap kits so that you have everything you need.
A solvent trap comes in various sizes and styles, and you can also use a makeshift solvent trap. The main idea of a solvent trap is to use a cylindrical or conical container with one end closed and the other one open. The solvent trap is designed to trap solvent inside a firearm’s barrel with one end comfortably sitting on the firearm’s muzzle while the opposite end is sealed; thus, trapping the solvent. This allows the solvent to absorb the propellant residue and trap them. The mixture of solvent and the residue can then be disposed of safely.
While the makeshift solvent trap is less costly, it is advisable to use standardized ones. Standard or custom solvent traps come in different sizes. However, you can use an adapter to fit the solvent trap into the size of your firearm muzzle. You can also use other kits like cleaning rods and bore snakes with solvents.

Home Remedy

A home remedy is any product you can find in your home or stores next door and convert into a firearm cleaning solution. One of the everyday products that can easily be converted into a cleaner for your firearm is a mixture of vinegar and hydrogen peroxide. Each of these products is used as a disinfectant in the home. However, they form a chemical compound that can be a strong firearm cleaner if combined. It absorbed lead from the build-up of dirt, abrasive flakes, and unburnt propellant. This solution, however, creates a new compound that is highly toxic. 
Unlike a solvent that does not chemically react with the object, the combination of vinegar and peroxide reacts with propellant residue and the firearm. Therefore, it is not safe to use this solution. Because you might not know the chemical components of the propellant you are using; thus, it is advisable to stay off such a home remedy.
One other home remedy but not really recommended is using washing soda. You can buy it in any drugstore. It has the corrosive properties to remove gunpowder stains or residue. Be careful when applying; use with extreme caution. If you are not really knowledgeable about how to use this remedy, better avoid it. You should only consider this if you have no other options. This is the last resort.
Should you consider creating a home remedy? As pointed out earlier, the mixture of vinegar and peroxide will react chemically with your firearm. There is a high possibility that you might not know the chemical compositions of your propellant. There is no guarantee how the home remedy will react with the propellant residue even if you do. Thus, to tread on the side of caution, it is advisable to avoid home remedies.
Gunpowder residue can be a problem for your firearm if you do not know how to clean and maintain it. The best advice, clean your firearms after every shooting session. That way, residue, and other dirt won’t build up. Use proper firearm cleaning solutions such as using gun solvent coupled with solvent trap kits to keep everything safe and clean.
For more expert firearm cleaning advice, click here to contact Armory Den support.
References

  1. https://www.crime-scene-investigator.net/understanding-gunshot-residue.html
  2. https://www.sciencedirect.com/topics/chemistry/nitroguanidine
  3. https://www.webmd.com/drugs/2/drug-18030/nitroglycerin-oral/details
  4. https://www.louisianasportsman.com/general/gun-cleaning-miracle-home-remedy/
  5. https://armoryden.com/hoppes-no-9-gun-bore-cleaner-5-oz-bottle/
Notice: Please be advised that this article is for information purposes only and Armory Den, Inc., Armory Den, and/or Armoryden.com, does not accept liability for any negligence, injury, death or other personal or environmental consequences that occur from the sourced and unsourced information in this article. 

Read More

Things to Avoid When Cleaning your Firearms

Cleaning your firearm is an essential part of firearm maintenance. It will ensure that your firearm works more efficiently, is safer, and lasts longer. However, when you don’t use the proper firearm cleaning solution, you might end up damaging your firearm. Many firearm owners try to save a few bucks using homemade concoctions to clean their firearms, which end up costing more. Various firearm cleaning solvents and oils are available, which are made for that specific purpose.

Firearm Cleaners vs. Firearm Oils

You need both firearm cleaning solutions and firearm oils when cleaning your firearms. A firearm cleaner is a chemical solution that eliminates built-up contaminants such as copper and carbon fouling in your firearm. Firearm cleaning solutions loosen copper and carbon built up in the firearm to come out easily. They also maintain your firearm’s appearance and value. 
On the other hand, firearm oil is a petroleum-based lubricant with a high level of refinement. It lubricates your firearm and prevents corrosion and rust on its metal parts.
Think of a firearm cleaner like car wash and firearm oils like car wash wax. You eliminate the build up, then wax that bad boy until it is slick.
Using firearm cleaners and firearm oils to maintain your firearms is paramount for their proper functioning. If you only use firearm cleaning solutions, your firearm can be exposed to corrosion and rust damage. Firearms also have extremely high friction when used, so lubrication is necessary. Suppose you only lubricate your firearm and do not clean it using the right firearm cleaners; it will attract dirt and debris, building up and affecting its performance.
So what are the absolute don’ts when choosing the right firearm cleaning solution?

4 Things You Should Avoid When Cleaning Your Firearms

Here are four important things to avoid when cleaning your firearm:

1. Cooking Oil

Using cooking oil to clean your firearms is never a good idea. Firearms round up a lot of heat and pressure when in use. They also get a lot of carbon and copper debris on them. Cooking oil as a firearm cleaning solution will only attract more dirt and affect your firearm’s performance. Frequently using cooking oil will cause more build-up on your firearm and degrade it further.
As a lubricant, cooking oil isn’t designed to withstand the high pressure and friction on a firearm’s metal parts. Most vegetable oils have a smoking point of 375℉. They are also quite viscous compared to most firearm lubricants. Soon enough, your firearm will be left unprotected and susceptible to rust and corrosion.
Some cooking oils also polymerize and solidify, which could gum up inside your firearm. At this point, they can’t even lubricate or protect your firearm from corrosion.

2. Brake Fluid/Brake Cleaner

Many firearm owners mistake using brake fluid or brake cleaner as a firearm cleaning solution because it gets the job done quite well. But, what most don’t know is that there is a catch. Although brake cleaner is not detrimental to metal surfaces, it can affect stock finishes by removing oil. It also eats away at plastic parts and loosens painted decorations on your firearm.
If used once or twice, the damage might not be apparent. However, with long-term use, your firearm will be left without any lubrication, which exposes it to rust and corrosion. You, therefore, have to keep re-oiling your firearm to replace the oils that have been stripped off when cleaning using brake fluid.
Using brake fluid or brake cleaner to clean your firearms is dangerous to you and your firearm. When exposed to heat or certain chemicals, it can become flammable and even toxic to inhale.
Chlorine brake cleaners, for instance, produce phosgene gas as a byproduct when heated up. Even in small concentrations, phosgene gas can induce scarring in your nose and lungs, as well as cause your pancreas to shut down. Non-chlorinated brake cleaners don’t produce this gas. However, they can still be detrimental to your skin, and breathing them for too long can result in various adverse effects, including dizziness, chemical pneumonitis, and dermatitis, among others.

3. Dishwasher

Cleaning your firearm in a dishwasher is an absolute don’t. Firearms have many nooks and crevices. When water gets trapped in these spaces, it can cause corrosion and rust on your firearm. The metal elements of the action and the barrels will also rust if they are washed in hot water or with dishwashing soap. You risk warping the stock if you soak wooden stocks for an extended period to remove oil, dirt, grime, or cosmoline.
Dishwashing detergents have a high sodium content, which helps dishes dry faster; this expedites corrosion and rust on metal surfaces on a firearm.
When cleaning a firearm, it’s best to use firearm cleaning solutions that will slip into the cracks and crevices to remove the build-up in there effectively. A dishwasher doesn’t make that possible, so although your firearm is clean outside, inside, the carbon and copper fouling is still present.

4. Gasoline/ Kerosene

You should never use any flammable product as a firearm cleaning solution.
Gasoline and kerosene are two flammable and dangerous substances that should not be used to clean firearms: gasoline and kerosene, harm firearm bluing and other metal finishes. The use of gasoline or kerosene to clean firearm stocks can destroy the stock finish if painted or lacquered.
Gasoline and kerosene can settle in the cracks of your firearm and cause a fire hazard when the firearm is fired. In the worst-case scenario, this can burn your hand terribly.
Armory Den’s gun cleaning solutions are designed for cleaning firearms and are available at affordable prices. You want to use these products to ensure your firearm is clean and safe for use at all times.
It is not enough to have the correct firearm cleaning solutions. Using premium Armory Den solvent trap kits will ensure you do the job correctly and keep your firearm in top shape.
Notice: Please be advised that this article is for information purposes only and Armory Den, Inc., Armory Den, and/or Armoryden.com, does not accept liability for any negligence, injury, death or other personal or environmental consequences that occur from the sourced and unsourced information in this article. 

Read More

FREE SHIPPING FOR ORDERS OVER $175!