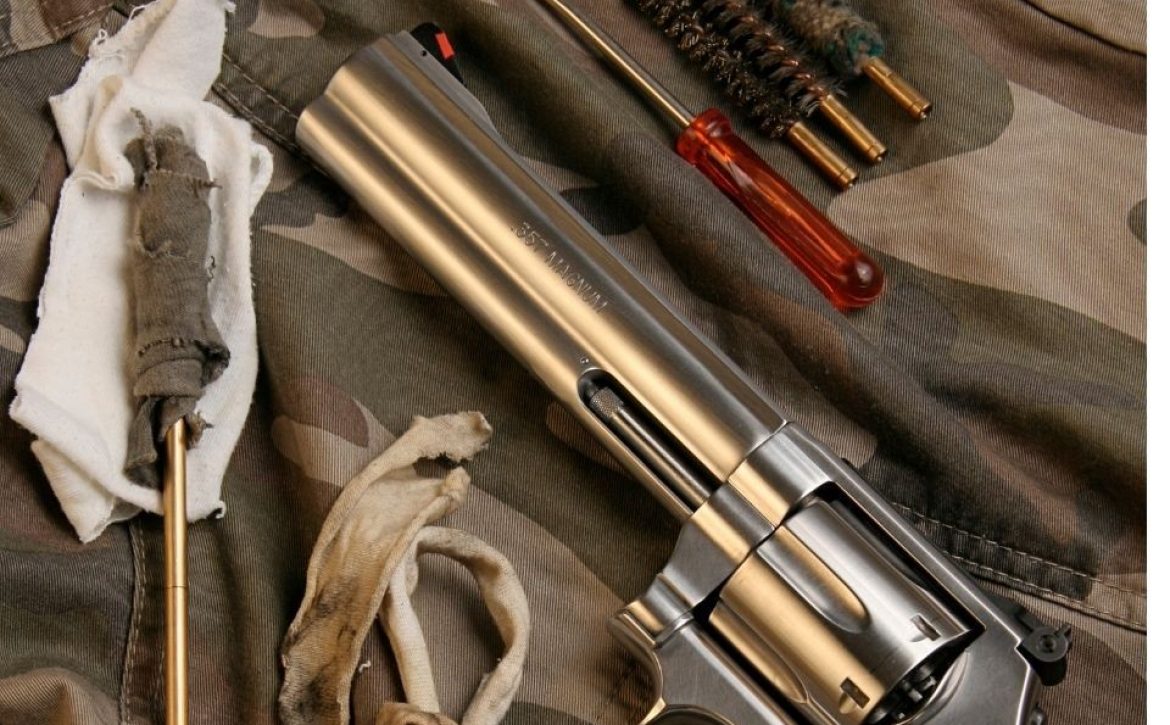
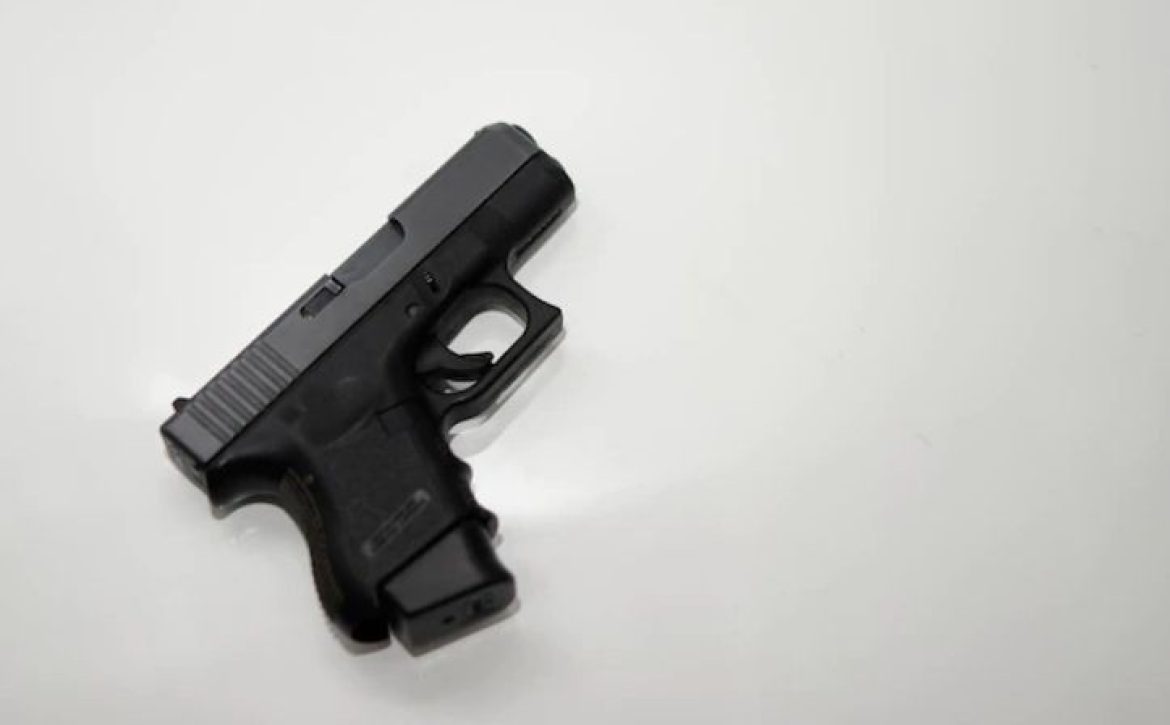
Common Gun Cleaning Mistakes That Can Damage Your Firearm

Cleaning your firearm is not the most glamorous of activities, but it is a necessity nonetheless. Every responsible firearm owner must clean their pieces regularly to ensure proper functionality and longevity. While there are firearm cleaning benefits, it’s important to execute the routine correctly to avoid damaging your firearm.
Here, we will outline some common firearm cleaning mistakes and how to avoid them.

Failing to Unload Your Firearm Before Cleaning

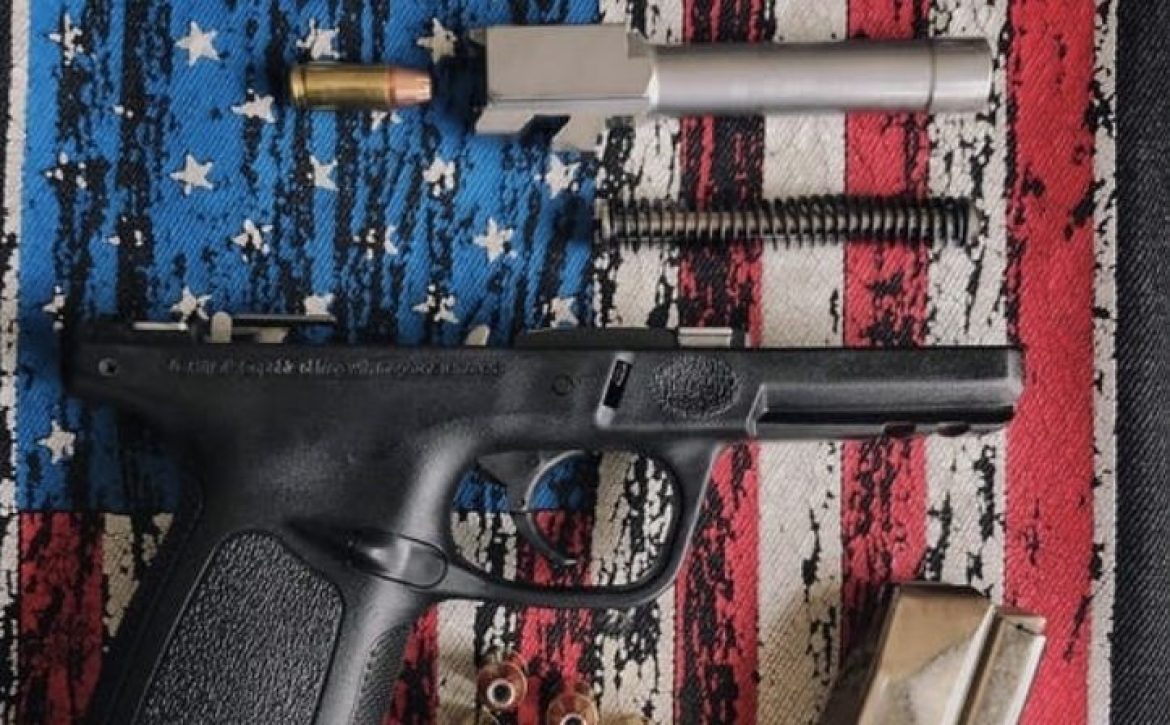
Failing to unload your firearm before cleaning is a potentially dangerous mistake, as it can result in an accidental discharge. When cleaning your firearm, ensure that the chamber is clear so that no ammunition is present. Remove the magazine and check the chamber for any rounds that you may have left behind.
Besides accidental discharges, cleaning your firearm with rounds in the chamber can cause damage to the firearm. Rounds can ricochet off the barrel or other surfaces inside the firearm and potentially cause injury. So, always remember to unload your firearm before cleaning.
*This article is for information purposes only and the publishers of this article accept no liability for any injury or death that may occur by anyone who has been exposed to the content of this article!

Using Gasoline or Kerosene to Clean Your Firearm

Using gas or kerosene to clean your firearm is a big no-no. These harsh chemicals can strip away the protective coating on your firearm, leaving it exposed to rust and corrosion. This chemical is bad for your firearm; it also constitutes a fire hazard risk.
A more reliable alternative for cleaning your firearm is a biodegradable product like Hoppe’s No. 9 Cleaner & Lubricant. This gun cleaning solvent will help you get rid of grime and dirt while preserving the protective coating of your firearm. More reliable cleaning solvents like this are available at Armory Den. You can reach out to us if you need one.

Failing to Remove The Cosmoline

Cosmoline is a slimy petroleum jelly that manufacturers use to preserve firearms. But once the firearm is out of storage and in use, it’s no longer necessary to have this preservative. So you may need to clean up the cosmoline on your firearm, especially if it looks messy.
But removing this substance is not as straightforward because it may have seeped into nooks and gaps in the metal. You’ll need acetone or mineral spirits and a little bit of heating and hard scrubbing to get rid of it. Failing to remove the cosmoline from your firearm can cause different problems, including corrosion, jams, and even complete firearm failure. So make sure you take the time to remove all traces of cosmoline.

Failing to Clean the Internal Components

Many firearm owners neglect to clean the internal components of their firearms because they are hard to reach. But skipping these parts can lead to fouling, which can cause the firearm to jam and even prevent it from firing correctly.
The internal components need to be cleaned just as thoroughly as the barrel and other external surfaces. To do this efficiently, ensure that your cleaning kit has small-size brushes and rags that can reach the tiny gaps in your firearm.

Not Using a Bore Guide

Another mistake that people make when cleaning their firearms is not using a bore guide. A bore guide is a slim, plastic, or metal rod that inserts into the firearm’s barrel and helps protect it from scratches or damage. It also ensures that the cleaning process is more accurate and thorough.
When you’re cleaning your firearm, the cleaning rod inevitably bounces around and can cause wear and tear on the barrel. But a bore guide centers the cleaning rod to move straight through the barrel, preventing any possible damage. So make sure to use a bore guide next time you clean your firearm.

Forcing Parts Back Together When Reassembling

Don’t try to force parts back together when reassembling. In the process, you could break something valuable. If those parts came off easily, they’d more likely fit back in the same manner unless there’s something you’re not getting right.
When reassembling a firearm, always ensure that you’re using the correct tools. And if there’s any part, you find confusing to fix, consult the user’s manual or take the firearm to a qualified gunsmith for assistance.

Failure to Use a Good Lubricant

Lubricant is so important during firearm maintenance because it acts as a barrier between the metal parts of the gun and the dirt, carbon, and other residues that build up over time.
A good lubricant will help keep the internals of your gun clean and free from corrosion while also reducing wear and tear. It’s important to use a lubricant with all these qualities: it must be non-toxic, soluble in water, and have low volatility (it won’t evaporate easily).

Disassembling Your Firearm Too Much

Many people think that the more they take apart their firearm, the more accessible it will become to ease the job. But this approach can be counterproductive. Over-disassembling your firearm can do more harm than good.
You should only disassemble your gun as much as necessary to clean it effectively during your cleaning routine. If you’re not sure how to properly clean your firearm, consult a professional. They will be able to show you the right way to clean your gun without damaging it.

Neglecting to Clean Magazines

Neglecting to clean the magazines can cause them to jam, preventing them from loading properly and potentially causing damage to the firearm.
To clean the magazine, you’ll need to remove it from the firearm. Be careful not to lose any parts. Once it’s out, use a cleaning brush or Q-tip to clean out any dirt or debris that may have accumulated. You can also use a light lubricant to lubricate the moving parts. Then reassemble the magazine and put it back in its place.
By avoiding these common mistakes, you can ensure that your firearm stays in good working condition and is ready to handle every task you need. Having a complete cleaning kit will make the maintenance routine a lot easier. You can find some of the best cleaning items at Armory Den, everything from cleaning brushes and solvents to solvent traps and muzzle extensions. Contact us today to find out more about the products we offer.
References:

  1. https://www.fieldandstream.com/guns/gun-cleaning-mistakes/
  2. https://www.survivopedia.com/dos-and-donts-of-gun-cleaning/
Notice: Please be advised that this article is for information purposes only and Armory Den, Inc., Armory Den, and/or Armoryden.com, does not accept liability for any negligence, injury, death or other personal or environmental consequences that occur from the sourced and unsourced information in this article. 

Read More

Proper Vehicle Firearm Storage Options: How to Choose

Like most firearm enthusiasts, you probably have a few firearms that you like to take with you when you go out. While it’s fun to shoot at the range or in the woods, you need to ensure that your firearms are stored safely and securely in your vehicle when they’re not in use.
Today, we’ll discuss some of the best vehicle storage options for firearms and how to choose the most suitable for your needs. Keep reading to learn more!

Vehicle Storage Options for Firearms

There are a variety of storage options for firearms in vehicles. The most common and obvious option is to keep the firearm in a case or lockbox in the trunk. This is usually a good idea, as it keeps the firearm out of sight and out of reach of potential thieves.
However, there are other options to consider if you want to keep your firearm more accessible and secure. Some of them include:

In-holster

One option is to keep the firearm in its holster. This is a good option if you want to be able to access the firearm quickly, but it can be uncomfortable to wear a holster for long periods.

Trunk vault

A trunk vault is a great option for storing firearms in your vehicle because it is out of sight and out of reach of potential thieves. Most trunk vaults are made from sturdy materials like steel or reinforced plastic, making them difficult to break into. Additionally, many trunk vaults come with features like keyed locks or combination locks for added security.
The main downside of using a trunk vault to store firearms in your vehicle is that they can be difficult to access in an emergency. If you need to get to your firearm quickly, you may have to open the trunk first, taking precious time.

Locking drawer

A locking drawer is a popular option for storing firearms in vehicles. This storage option is great because it’s usually very secure and can be hidden away from view. However, the downside of using a locking drawer is that it can be difficult to access your firearms during emergencies. Plus, most locking drawers are shallow and may not be able to accommodate all types of firearms.

Hard case

A hard case is another common option for storing firearms in vehicles. Hard cases offer good protection for your firearms and can be hidden away from view. However, hard cases can be expensive and difficult to access in an emergency.

Vehicle firearm rack

A vehicle firearm rack is a great option for storing firearms in vehicles because it allows you to quickly and easily access your firearms in an emergency. However, vehicle firearm racks can be difficult to install, and they may not offer the same level of protection as other storage options.

Console vault

The console vault is a popular storage option for firearms because it’s out of the way and doesn’t take up much space. Most console vaults are made of steel and have a keyed or combination lock.
The benefit of a console vault is that it’s usually out of the reach of small children. Even if they somehow manage to get into the vault, they likely won’t be able to open it. Another advantage is that many console vaults come with a mounting plate to bolt it down—this makes it more difficult for someone to steal your firearms.
However, the drawback of a console vault is that it’s not always easy to access your firearms in an emergency. If you need to grab your firearm quickly, you might have to stop and unlock the vault first. Moreover, console vaults can be quite pricey. If you’re on a budget, this might not be the best option.

Firearm safe

A firearm safe is another popular option for storing firearms in your vehicle. Firearm safes come in various sizes, so you can choose one that’s big enough to hold all of your firearms. Most firearm safes have keyed, or combination locks, and some even have fingerprint scanners.
One advantage of a firearm safe is that it typically provides more protection than a console vault. If your car is involved in an accident, your firearms will be much better protected in a firearm safe. In addition, firearm safes usually have more room than console vaults so that you can store other items in them as well (ammunition, scopes, and attachments).
However, one disadvantage of firearm safes is that they’re often quite heavy and difficult to move. If you need to change vehicles frequently, this might not be the best option. Another disadvantage is that firearm safes can be quite expensive. If you’re on a budget, you might want to consider another storage option.

Hidden compartment

A hidden compartment is another great option for storing firearms in your vehicle. Hidden compartments can be installed in various places, such as under a seat, trunk, or glove box.
The advantage of a hidden compartment is that it’s usually effortless to access your firearms. If you need to grab your firearm quickly, you can reach for it and go. Another advantage is that hidden compartments are usually quite affordable. You can find many DIY kits online or at your local hardware store.
Nonetheless, the drawback of a hidden compartment is that it’s not always as secure as a console vault or firearm safe. If someone knows where to look, they might be able to find your firearms. Furthermore, hidden compartments can be difficult to install. If you’re not handy with tools, you might want to hire a professional to do it for you.

Safety Considerations for Storing Firearms in Vehicles

While it’s important to choose a storage option that meets your needs, there are some other safety considerations to keep in mind when storing firearms in vehicles. Here are a few tips to help you stay safe:
  • Make sure the firearm is unloaded before storing it in the vehicle.
  • Store the firearm in a locked compartment, safe, or container.
  • Keep the ammunition stored separately from the firearm.
  • Do not store firearms where they can be easily seen or reached by children or unauthorized adults.

What to Consider When Choosing a Vehicle Storage Option for Your Firearm

There are many reasons why you might need to secure your firearm in your vehicle. Maybe you’re a law enforcement officer who needs to transport a weapon to and from work, or maybe you simply want to keep your firearm out of sight and out of reach of children or unauthorized people.
Whatever the reason, it’s crucial to choose a storage option that will keep your firearm safe and secure while still allowing you quick and easy access when you need it.
Here are a few things to consider when choosing a vehicle storage option for your firearm:
  1. Ease of access – You’ll want to choose a storage option that allows you to quickly and easily access your firearm when you need it and keeps it securely stored when you don’t. A good option for this is a locking glove box or center console.
  2. Concealment – If you’re worried about someone seeing your firearm, you might want to choose a storage option that offers some degree of concealment, such as an under-seat lockbox.
  3. Mounting options – Some vehicle storage options need to be mounted to be used, so make sure you choose an option that can be easily installed in your vehicle.
  4. Cost – Vehicle storage options can range in price from around $20 to $200, so choose an option that fits your budget.
No matter your reason for needing to secure your firearm in your vehicle, there’s a storage option that will fit your needs. Just be sure to consider all of the above factors before making your final decision.

Tips for Keeping Your Firearms Safe in a Vehicle

In addition to choosing the right storage option for your firearm, there are also a few general tips you can follow to help keep your firearm safe in your vehicle:
  1. Keep it out of sight – If possible, keep your firearm hidden from view to deter thieves and prevent accidents.
  2. Unloaded and disassembled – When storing your firearm in a vehicle, make sure it is unloaded and disassembled (if possible) to reduce the risk of an accidental discharge further.
  3. Avoid hot cars – Never leave your firearm in a vehicle parked in direct sunlight or a hot environment, as this can damage the firearm and make it more susceptible to accidents.
  4. Know the laws – Be sure to familiarize yourself with the firearm laws in your state before storing a firearm in your vehicle, as there may be specific regulations you need to follow.

The Best Way to Store Your Firearms in Your Vehicle

The best way to store your firearm in your vehicle is a storage option that keeps your firearm secure and easily accessible in case of emergencies. However, regardless of the storage option you choose, it’s vital that you clean and lubricate your firearm properly before carrying it or storing it in your vehicle.
At Armory Den, we offer various firearm cleaning kits and solvent traps to help you clean and keep your firearms in proper working condition. We know the importance of firearm maintenance concerning the durability of any firearm, and we are committed to helping you ensure that your firearm lasts as long as possible.
If you have any further questions about firearms or vehicle storage options for firearms, please don’t hesitate to reach out to us.
Notice: Please be advised that this article is for information purposes only and Armory Den, Inc., Armory Den, and/or Armoryden.com, does not accept liability for any negligence, injury, death or other personal or environmental consequences that occur from the sourced and unsourced information in this article. 
Read More

A Quick Guide to Cleaning Your Reloading Equipment (Press)

Cleaning your reloading equipment ensures that your rounds fire correctly, and also helps prevent malfunctions and enhances the safety of your ammunition.
Whether you’re getting your firearm ready for the hunting season or are preparing for your target-shooting event, this guide should help you have a seamless shooting experience.
We will discuss the best ways to clean your reloading press and provide you with helpful tips on preventing corrosion and other damage.

Firearm Reloading Equipment Cleaning and Maintenance: The Key Concepts to Focus on

Effective cleaning and maintenance of firearm reloading equipment requires adequate preparation and the proper tools and cleaning supplies.
Before starting, make sure you have everything you need within arm’s reach. This includes:
  • A clean work area
  • Lubricating oil
  • Cleaning solvent
  • Rags or paper towels
  • Old toothbrush (optional)
Now that you have everything you need, let’s get started.

Disassemble the Reloading Press

Start by disassembling your reloading press according to the manufacturer’s instructions. Once it is disassembled, take a look at all of the parts.
Inspect each piece for dirt, debris, or any other foreign substance. If you see anything that doesn’t belong, use a rag to remove it.

Clean the Press

Once you have inspected and set aside all the parts and pieces of your reloading equipment, it is time to move on to the main business; cleaning the press. This can be easy or challenging, depending on the type of press.
If you have a turret press, the process is pretty straightforward
Unscrew the dies from each turret and put them to the side. Next, use a soft brush to remove any powder residue or buildup from the turrets. Once that is done, move on to cleaning the press frame.
An excellent way to clean the frame is to use a combination of compressed air and a soft brush. This will remove any dirt or debris that has been collected on the frame. Once you have done this, wipe down the frame with a rag to remove any lingering residue.
Now that the press is clean, it is time to move on to the dies
The first step is to remove any buildup on the dies. This can be done with a soft brush or a die pick. Once you’ve removed the buildup, you can use Hoppe’s gun bore cleaner to clean the dies before wiping down the dies with a rag to remove any residual solvent.
Once the dies are clean, it is time to move on to the primer tray
The primer tray should be cleaned with a soft brush and compressed air. Once the tray is clean, wipe it down with a rag to remove the residual cleaning solvent. With the reloading equipment now clean, you can put it away in a clean, dry place for a few minutes before starting the lubrication process.
Now that the reloading press and its associated parts are clean, we can lubricate them in preparation for reassembly.

Lubricate the Press

Before you reassemble the press, you will need to lubricate all moving parts. This includes the ram, die carrier, and other moving parts on the press.
You can use any lubricating oil that you have on hand. However, it is essential to make sure that it is light and non-abrasive.
Lubricating the Ram
To lubricate the ram, you will need to remove the die from the carrier. Once the die is removed, you can apply a light coat of oil or grease to the ram. Focus only on the ram’s components that come into contact with other metals in the press. Be sure to wipe away any excess oil before reassembling the press.
Lubricating the Die Carrier
You do not need to remove the die carrier to lubricate it. Simply apply a light coat of oil or grease to the die carrier’s moving parts. Again, wipe away any excess before reassembling the press.
Lubricating the Arm
You will need to lubricate the arm of your reloading press before each use. A simple lubricant like oil or grease will do the trick. Just apply enough lubricant to the moving parts of the arm and allow the oil or grease to sip into the arm’s moving components.
Ensure you apply equal amounts of lubrication to any pivoting points of the arm to create balanced friction and a seamless movement of parts.
Lubricating Other Moving Parts
You will need to lubricate a few other moving parts on the press. These include the pivoting pins, shell plate, and turret and die.
As with the pivoting pins, you’ll need to apply a small amount of oil or grease to these parts. However, you don’t need to be as generous with the lubricant as with the arm. A light coat will do just fine.
Once you’ve applied the lubrication, move each of these parts back and forth to work the lubricant into the moving components. It would help if you also took this opportunity to inspect the parts for any damage or excessive wear.
The turret and die are two of the essential parts of your reloading press, so it’s necessary to make sure they are well-lubricated. Use your finger or an old cloth to apply lubricant to the inside of the press housing to lubricate the turret and die.
Finally, apply a small amount of lubricant to the outside of the turret and die; this will help to keep them from rusting.
Cleaning your reloading equipment is essential to ensure that it lasts for many years. The number of times you’ll be cleaning your equipment depends on how often you reload and the number of rounds you fire at a time. Ensure you clean as frequently as you need to maintain your equipment’s performance.
You shouldn’t equally forget to clean your entire firearm using approved solvent traps kits from Armory Den that will help you maintain a clean firearm for prolonged services.
By following the above simple steps, you can keep your equipment in top condition and enjoy a seamless reloading and firing experience.
Notice: Please be advised that this article is for information purposes only and Armory Den, Inc., Armory Den, and/or Armoryden.com, does not accept liability for any negligence, injury, death or other personal or environmental consequences that occur from the sourced and unsourced information in this article. 

Read More

Essential Hunter’s Kit: Must-Have Tools & Accessories for Your Next Hunting Trip

Whether you’re a seasoned hunter or just starting out, it’s essential to have the right gear and tools for your next hunting trip. There’s much equipment to choose from: knives and ammunition, tents, and firearm cleaning and maintenance kits.
This guide will help you prepare for your next hunting adventure. We’ll discuss the must-have tools and accessories for your next hunting trip so you can improve your chances of successful kills out in the wild.

The Right Weapons and Tools

First and foremost, you’ll need the right weapons and tools for your hunt. If you’re planning on hunting big game, you’ll need the correct type of firearm for the job. For small games, an air rifle will do the job just fine.
Regardless of what type of game you’re hunting, make sure you have the correct ammunition. It’s also essential to have a sharp knife handy for gutting and skinning your prey. A good pair of binoculars will also come in handy for spotting games from a distance.
One more thing, always carry a portable cleaning kit so you can clean your firearm on the go and resume your shooting without too much strain. A clean firearm is an effective firearm.

Clothing and Footwear

Next, you’ll need to make sure you’ve dressed appropriately for the hunt. Depending on the season and location, you’ll need to pack different types of clothing. However, you should always dress in layers to prepare for any weather conditions. Your base layer of clothing should be made of polyester, silk, nylon, and merino wool, which can easily absorb sweat from your body and keep you dry.
As for footwear, start with a good pair of non-cotton socks that will absorb sweat and keep your feet warm and dry. The next thing is to look for a good pair of hunting boots to protect your feet and keep them dry. You don’t want to be miles away from camp and suddenly realize you’ve developed blisters all over your feet and can’t continue your hunting adventure!

Hunting Blinds

If you’re planning on still hunting, a hunting blind can be a Godsend. A suitable blind will help you stay concealed from your prey and provide some shelter from the elements. When choosing a hunting blind, make sure it’s large enough for you to move around comfortably and that it will provide good camouflage.
The right type of blinds depends on the game you’re hunting and the level of concealment or field of view that you’re looking to achieve. If you’re hunting deer or turkey, you might want to settle for silent deer blind windows. However, if you’re hunting smaller animals like coyotes or birds, you might want to use universal blinds for a better field of view.

Tree Stands

If you’re an avid deer hunter, you’ve spent some time hunting from a tree stand. Tree stands offer a great vantage point for spotting and taking down games, but they can be dangerous if you’re not careful. When using a tree stand, always use a fall-arrest system to prevent serious injury if you should happen to fall.

Legal Hunting Documentation

Proper hunting documentation is one of the essential things to acquire before heading out on your next hunting trip. This includes a valid hunting license and any permits or tags required for the game you’re pursuing.
Depending on the state you come from, lack of a valid hunting license can result in a hefty fine, and you may even lose your hunting privileges. So make sure you’re up to date on all the requirements before heading out.

A Hunter's Backpack

Your backpack is going to be your best friend on a hunting trip. It’s essential for carrying all your gear, including your food, water, shelter, and extra clothes. When choosing a backpack, make sure it’s comfortable and has enough space for everything you need.
It would help if you also considered getting a pack with specific features for hunters, such as a built-in rain cover and a place to attach your rifle or bow.

A Good Camera

While you’re out in the wild, you will want to document your experience. A good camera is a great way to do that. But don’t just get any old camera. Make sure it’s durable and can handle being dropped or getting wet. You’ll also want to make sure the camera has features specific to hunters, such as a night vision setting.

GPS Tracker

A GPS tracker is a must-have for any hunter. It can help you keep track of your location, especially if you’re hunting in unfamiliar territory. It can also come in handy if you get lost or injured and need to be found by search and rescue.

Compass

A compass is another essential piece of equipment for hunters. It can help you navigate the woods and ensure you don’t get lost.

Enough Food and Water

Of course, you’ll need to bring enough food and water for yourself and your hunting partners. It’s always better to err on caution and bring more than you think you’ll need. You don’t want to run out of food or water in the middle of a hunt.

Binoculars

Binoculars are an excellent tool for hunters. They can help you spot game from a distance, which is especially helpful if you’re hunting in an area with dense vegetation. They can also scout out potential hunting areas before you even set foot in the woods.

Flashlight

A flashlight is another essential piece of equipment for hunters. It can help you see in the dark, crucial for safety and successful hunting. You can also use it as a form of communication to signal for help if you get lost or injured.

First-Aid Kit

A first-aid kit is an essential piece of equipment for any hunter. It can treat minor injuries, such as cuts and scrapes that you may have sustained while hunting. You can also use it to treat more severe injuries, such as snake bites or broken bones.
With these essential items in your hunter’s kit, you’ll be ready for anything. From safety gear to legal documentation, preparing will help ensure a successful and enjoyable hunting trip. Remember to keep your weapons, especially firearms, clean and functional with the help of a portable cleaning kit for a continuous and successful hunting experience.
Notice: Please be advised that this article is for information purposes only and Armory Den, Inc., Armory Den, and/or Armoryden.com, does not accept liability for any negligence, injury, death or other personal or environmental consequences that occur from the sourced and unsourced information in this article. 

Read More

Step-By-Step Guide for AR-15 Cleaning Maintenance

As firearm enthusiasts, we know that proper firearm cleaning and maintenance is key to keeping our firearms in top condition. This ensures that our weapons function flawlessly, but it also helps preserve their resale value down the road.
A proper firearm cleaning kit can make the process much easier and ensure that your rifle is in good working condition when you need it.
This guide will discuss the step-by-step process of effectively cleaning an AR-15 rifle. We’ll also provide some tips on keeping it in good condition for years to enjoy the full potential of your AR-15 firearm.

Stepwise Guide on Cleaning an AR-15 Firearm

Both beginners and experts struggle at one point to clean their AR-15 rifles. The cleaning process shouldn’t be challenging if you take the time. Here is a step-by-step guide on how to clean your AR-15 firearm.

Step One: Assemble the Necessary Tools

Start by assembling all the necessary tools such as gun cleaning solution, firearm oil, rags, cotton swabs, and a bore brush. You will also need a set of Allen wrenches to remove some of the smaller parts from the gun.
You can buy each piece separately, especially if you own other firearms, or buy an AR-15 cleaning kit with everything you need to clean your AR-15 firearm.

Step Two: Prep the Cleaning Area

Once you have all the necessary tools, prep your cleaning area by spreading out a mat or some old towels; this will help protect your surfaces and make cleanup much easier. You’ll also want to put on gloves to protect your skin from the irritation caused by some of the chemicals you’ll be using to clean your firearm.

Step Three: Take Down the AR-15 Rifle

The next step is to strip down or disassemble your AR-15 rifle—this will make it easier to access all the parts that need cleaning.
To do this, start by removing the bolt carrier group. Then, proceed to remove the handguard and remove the stock.
To remove the bolt carrier group, you’ll need to:
  • Make sure the firearm is unloaded.
  • Locate the charging handle and pull it back until it locks into place.
  • Press down on the two takedown pins located on the upper receiver (these are usually located at the front and rear of the gun).
  • Once the pins are disengaged, pull the upper receiver away from the lower receiver.
The bolt carrier group will now be exposed – you can remove it by simply pulling it out.
To remove the handguard, start unscrewing any screws or bolts holding it in place. Once these are removed, the handguard should come right off.
First, take off the buttpad by unscrewing it to remove the stock. With the buttpad removed, you should see a screw or bolt holding the stock in place – remove this, and the stock should come right off.
With the stock removed, you should now have full access to the inside of the gun.

Step Four: Clean the Barrel

Use a bore brush dipped in the gun cleaning solution to scrub any dirt, debris, or carbon buildup in the barrel. Be sure to rotate the brush several times and clean from back to front to ensure that you are getting a thorough clean.
Once you are finished, use a clean rag to wipe down the inside of the barrel to make sure every particle of dirt is driven out.

Step Five: Clean the Bolt Carrier Group

The bolt carrier group is one of the essential parts of the AR-15, so it is necessary to clean it regularly. Use a brush and gun cleaning solution to scrub the bolt carrier group. You can spray the various parts of the bolt carrier group with the solvent and brush them down gently to eliminate the debris.
You can use a .45 caliber nylon brush to clean out the debris from the inside parts. Please pay special attention to the gas key, firing pin, and bolt carrier itself, as these areas are prone to carbon buildup and are always more challenging to clean.
Once you are finished, use a clean rag to wipe down the bolt carrier group. Also, inspect the bolt carrier group parts before reassembling them to ensure they’re not deformed or cracked.

Step Six: Clean the Lower Receiver

Use a degreaser and scrub the inside of the lower receiver. You can use an old toothbrush to reach all the problematic areas. Once you are finished, use compressed air to remove any leftover particles from the receiver.

Step Seven: Clean the Buffer Assembly

The buffer assembly is what helps to cycle the action of the AR-15. It is located in the buttstock of the rifle. You will need a cleaning rod, a cotton swab, a cleaning solvent, and lubricating oil to clean it.
Start by disassembling the buffer assembly. Take out the buffer, the buffer spring, and the action spring.
Then, take your cleaning rod and run it through the inside of the buffer tube to clean out any debris that may have accumulated. Be sure to also clean the threads on the outside of the tube.
Once you have done that, soak the cotton swab in cleaning solvent and run it through the buffer assembly to remove any residue.
Finally, lubricate the buffer assembly with a light coat of oil and reassemble it.

Step Eight: Assemble the AR-15

Now that everything is clean, you can start reassembling your AR-15.
Begin by attaching the lower receiver to the upper receiver. Then, insert the bolt carrier group and charging handle.
Next, install the hand guards and the gas tube. Once you’re done with that, you can attach the muzzle device of your choice. Finally, install the buttstock, and you are good to go!
Cleaning and maintaining your AR-15 is not as difficult as it may seem. By following the steps outlined in this guide, you can keep your rifle in top condition and ensure that it will be ready to perform when you need it most.
A well-maintained AR-15 is a reliable and accurate weapon; be sure to take good care of it.

Read More

Aluminum vs. Titanium Solvent Traps: Which One to Choose?

It can be hard to know which solvent trap to choose when looking for a way to clean your firearms. Aluminum solvent traps are a popular choice, but titanium solvent traps have been gaining popularity lately within the firearms community.
Both have their pros and cons, but which one should you choose for your needs? Here’s a breakdown of both solvent traps so you can properly decide which one is better suited to your needs.
But before we get into that, here’s an overview of solvent traps for those unfamiliar with the term.

What are Solvent Traps?

A solvent trap is a device that is used to capture volatile organic compounds (VOCs) and other pollutants before they escape into the atmosphere. But more importantly, it’s a device used to trap firearm cleaning solvent during firearm cleaning operations allowing the solvent to be reused or disposed of properly.
Solvent traps are often used by gunsmiths, hobbyists, and other professionals who work with firearms. They typically have a threaded end that is attached to the threaded barrel of the firearm.
When cleaning firearms, the intricate structures in a solvent trap capture debris from the firearm while allowing the solvent to flow through a hole until it reaches the cup at the bottom. This feature allows firearm owners to clean their weapons without creating a mess in the process.
There are various types of solvent traps. However, for the purpose of this post, we will be looking at the two main types.
  • Aluminum Solvent Traps
  • Titanium Solvent Traps

Aluminum Solvent Traps

Of the two types of solvent traps mentioned, aluminum traps are the most common type. They are usually made from stamped or extruded aluminum which is then transformed into various sizes and shapes.
They also have a large internal diameter, making them ideal for cleaning large firearms. Plus, because of the lightweight nature of aluminum, they are very easy to transport and use in a variety of situations.
Aluminum solvent traps are inexpensive and easy to make, but they have a few drawbacks. One is that they can be easily damaged if not handled properly. They are also susceptible to corrosion, which can shorten the life of the solvent trap. Moreover, aluminum solvent traps tend to clog up more quickly than titanium solvent traps, requiring more frequent cleaning.
Overall, aluminum solvent traps are a good choice for those looking for an inexpensive option that is easy to use and relatively durable. However, they may need to be cleaned more often than titanium solvent traps.

Pros:

  • They are lightweight.
  • They can be easily transported.
  • They are inexpensive.
  • They are suitable for large firearms.

Cons:

  • They are easily dented, scratched, or damaged.
  • They are susceptible to corrosion and wear.
  • They clog up faster than titanium traps

Titanium Solvent Traps

Titanium solvent traps are becoming more popular within the firearms community. They are made from durable titanium or titanium alloy, making them stronger and more durable than their aluminum counterparts.
Titanium solvent traps also have a number of advantages over aluminum solvent traps. For starters, they are resistant to corrosion and wear, so they will last longer. They are also less likely to clog up, making them a good choice for those who need to clean their firearms frequently.
However, titanium solvent traps have some disadvantages: they are heavier than aluminum solvent traps, are not as readily available as aluminum solvent traps, and have a smaller capacity than aluminum solvent traps.
Overall, titanium solvent traps are more expensive than their aluminum counterpart, offering superior performance and durability.

Pros:

  • They are strong and durable.
  • They are resistant to wear.
  • They can withstand corrosion.
  • They are suitable for frequent firearm cleaning.
  • They are less likely to be damaged, scratched, or dented.

Cons:

  • They are heavier.
  • They are more expensive than aluminum solvent traps.

Which is Best? Aluminum or Titanium?

Ultimately, deciding which solvent trap to choose comes down to personal preference. Both aluminum and titanium solvent traps have their advantages and disadvantages, so it is up to the individual to decide which one is best suited to their needs.
However, here are a few general guidelines to help you in your selection process:
  • If you are looking for an affordable and lightweight solvent trap, then aluminum is the best option.
  • If you are looking for a more robust and more durable solvent trap that is less likely to be damaged if dropped, titanium is the better option.
Regardless of the type of solvent trap you choose, read and follow the safety instructions carefully to avoid any accidents.

Importance of Solvent Traps

Solvent traps are an essential tool for firearm owners and the environment at large. By trapping solvents and other chemicals, solvent traps help keep these materials out of the environment. This is important because these chemicals can be harmful to people and the environment.
In addition to their environmental benefits, solvent traps also have several safety benefits for firearm owners. These traps help keep dangerous fumes from escaping into the air by trapping solvents. This makes it safer for gun owners to clean their firearms and reduces the risk of accidental fires.
Moreover, firearm cleaning solvents are relatively expensive, and it would be a shame to see them go to waste after one round of cleaning. By trapping the cleaning solvent, solvent traps act as a safe storage container for expensive cleaning solvents to be trapped and reused.
Overall, solvent traps are an essential tool for keeping our environment safe and our firearms clean. Thanks to their many benefits, solvent traps should be a key part of any firearm owner’s toolkit.

The Best Solvent Trap for Your Firearm

The bottom line is that both aluminum and titanium solvent traps have their pros and cons, and it is crucial to choose the right one for your needs. When in doubt, consult with a firearms expert like Armory Den to help you decide which solvent trap is best for you.

Read More

Beginner’s Guide to Muzzle Brakes: Why Are They Used?

Muzzle brakes are one of those firearm accessories that can be a little confusing for beginners. While their primary purpose is to reduce recoil, they also offer other advantages to firearm owners.
Here, we will take a look at what muzzle brakes are and why they’re used. We’ll also go over the different types available on the market today. So, if you’re new to muzzle brakes, read on! You might learn something new.

Overview of Muzzle Brakes

What Are They?

A muzzle brake is a device threaded to the barrel of a firearm, most notably, they are used on AR platforms, such as AR-10s, AR-15s or AR-9s . It is designed to redirect propellant gases exiting the barrel in such a way as to reduce recoil and also some of these devices are equipped with build in flash hider cut outs to further reduce recoil and disperse muzzle flash. In addition to these aforementioned benefits, muzzle brakes also offer several other benefits.

Working Principle

As mentioned above, muzzle brakes are used on firearms to redirect propellant gases away from the barrel and, thus, reduce recoil and muzzle rise. They work by trapping a small portion of the expanding gas created when a round is fired.
This gas is then redirected outwards and perpendicular to the barrel, which slows down the firearm barrel’s rearward movement and reduces recoil. Muzzle brakes can also help keep the firearm steady during rapid-fire by minimizing muzzle rise. 
Muzzle device uses, like many other firearm parts, have been evolved and many firearm owners are now also using them to support streamlined cleaning. The way this works, is firearms owners will purchase muzzle brakes that are equipped with some type of outside thread that matches up with a Quick Detach (QD) muzzle device, Trilug Muzzle Device (Also known as a 3-Lug Muzzle Device), among other constantly improved and innovative designs. The quick detach muzzle device will attach to the muzzle brake through quickly snapping onto a proprietary thread. Common Quick Detach threads are ACME threads and fairly standard across the firearms industry.
How does this help with streamlined cleaning? Well, have you ever removed your muzzle brake or flash hider to install a solvent trap for bore cleaning and solvent and debris trapping? You normally need an AR Wrench, a Vice and a bit of patience. It’s cumbersome and quite frankly, pointless in today’s day and age. With a Quick Detach + Muzzle Brake setup, you are able to thread the Quick Detach device onto your solvent trap and once your firearm is completely unloaded and deemed safe, you can quickly snap the unit over the muzzle brake and proceed with cleaning. You are able to do all of this without using a Vice, AR Wrench, other tools and much time is saved!

Types of Muzzle Brakes

There are three main types of muzzle brakes: expansion chambers, linear compensators, and hybrid brakes.
  • Expansion chamber muzzle brakes work by trapping the gases as they exit the barrel and then releasing them in a controlled manner. This allows the gases to expand and dissipate more gradually, which reduces recoil.
  • Linear compensators work by redirecting the gases in a straight line. This helps to counteract the vertical movement of the barrel caused by recoil.
  • Hybrid brakes combine the features of both expansion chambers and linear compensators. They trap the gases and then redirect them in a straight line. This helps to reduce recoil even further than either type of brake on its own.
Several other types of muzzle brakes are available, such as side-firing brakes and parabolic brakes. However, these are less common and not as well-known.

Muzzle Brakes vs. Compensators

The difference between muzzle brakes and compensators is that muzzle brakes are designed to redirect the gas in all directions, while compensators are designed to direct the gas mainly upwards. This is why muzzle brakes are more effective at reducing recoil than compensators.
Muzzle brakes also have the added advantage of mitigating flash signatures. When a round is fired, it emits a bright flash of light. This can be dangerous for both the shooter and anyone else nearby. Muzzle brakes help to reduce this flash by redirecting the gas away from the shooter’s line of sight.

Why Are Muzzle Brakes Used?

  1. Reduces recoil: The primary reason muzzle brakes are used is to reduce recoil. Recoil can be quite uncomfortable and even dangerous for some shooters, especially those not used to it. Muzzle brakes help mitigate this recoil by redirecting the gases exiting the barrel. This reduces the amount of energy transferred to the shooter while also improving accuracy.
  2. Prevents muzzle rise: Muzzle brakes also help prevent muzzle rise, which is when the firearm barrel rises after firing. This can cause your shots to go off target and make staying on target harder. Muzzle brakes help keep the barrel down so you can stay on target better.
  3. Reduces stress on your shoulder: Muzzle brakes can help to reduce the strain on your shoulder when firing. This is because they reduce recoil, which means you don’t have to work as hard to keep the firearm in position. This can be helpful for those who shoot often and want to avoid shoulder pain.
  4. Improves follow-up shots: Muzzle brakes can help keep your sight on target for follow-up shots. When a firearm is fired, the exiting bullet creates a large amount of smoke, preventing the shooter from seeing their target. Muzzle brakes help prevent this by reducing the resultant smoke, thereby helping the shooter make better follow-up shots.
  5. Helps in hunting: Muzzle brakes are popular among hunters. They help reduce recoil, which makes shooting a firearm easier. This can be particularly beneficial for hunters carrying a rifle for long periods

How to Choose the Right Muzzle Brakes?

There are various factors that go into choosing the right muzzle brakes for your firearm. The most important consideration is the caliber of your weapon. You need to make sure that the muzzle brakes you pick are compatible with your firearm. In addition, you need to consider the barrel length and model of your firearm.
Apart from the above factors, other factors you need to consider include:
  • The barrel diameter of the firearm
  • The thread pitch of the firearm
  • The amount of recoil reduction you need
Once you have considered these factors, you can start looking at specific muzzle brakes that fit your needs.

Downsides of Muzzle Brakes

Muzzle brakes can create a loud noise when they are fired. This can be a problem for people trying to shoot quietly or for people close to the shooter. Moreover, various muzzle brakes like on the 16″ AR rifle can make shooting the rifle almost unbearable, especially when shooting without hearing protection.
Muzzle brakes are a great option for those looking for recoil reduction. They can also be used to help improve your accuracy and shooting performance. If you’re considering purchasing a muzzle brake, be sure to do your research on the thread pitch of your weapon and find the one that best suits your needs.
Regardless of the type of muzzle brake you opt for, you will need to clean your firearm and your muzzle brakes after each use to ensure they are in perfect condition. We at Armory Den are committed to providing you with varieties of solvent traps and firearm cleaning kits so that your firearm and accessories can last for as long as possible.

Important Note: This article is for streamlined cleaning related information purposes only. Armory Den does not sell muzzle devices or streamlined cleaning devices. All available firearm cleaning & firearm accessory products currently offered for sale by Armory Den are located in the shop area.

However, please don’t hesitate to reach out to us if you have any further questions about muzzle brakes or finding a suitable muzzle brake for your firearm.
Notice: Please be advised that this article is for information purposes only and though some firearm owns utilize muzzle brakes for quick detach or streamlined AR Platform cleaning, Armory Den, Inc. | Armoryden.com does not sell Muzzle Brakes. The information in this article serves only for general firearm parts education and does not imply any recommendation nor position by Armory Den, Inc.

Read More

Top 7 Solvents for Removing Carbon

Here’s how to prevent carbon build-up in your firearm. Like anything else in your house, if you don’t take care of your firearm, it will look pretty nasty and even malfunction. Fortunately, cleaning firearms is relatively easy – as long as you have the right cleaning solvent.
So, what are carbon solvents, and more importantly, what are the top carbon solvents for removing carbon? Keep reading to find out!

What are Carbon Solvents?

Most firearms shooters have experienced the frustration of carbon build-up in their weapons at one time or another. This build-up can cause all sorts of problems, from jams to decreased accuracy. Fortunately, several different solvents can help prevent carbon build-up. These solvents are known as carbon solvents.
Essentially, carbon solvents are solvents that are capable of dissolving carbon residue from firearms. They come in various forms, including aerosols and liquids, with each form having varying degrees of solubility for carbon.
Moreover, due to the organic nature of the solvents, they can be mixed with various other organic liquids to aid in the removal of other impurities from firearms, such as copper and lead.

Top 7 Solvents for Removing Carbon

There are a variety of solvents that can be used to remove carbon from firearms. Some solvents are more effective than others, and some are more dangerous to use. Nonetheless, here are the top 7 solvents for removing carbon from firearms.
  1. Remington Oil: This solvent is a favorite among shooters and firearm enthusiasts. It’s effective in removing carbon build-up and is safe to use on all firearms.
  2. Hoppe’s No. 9: Another popular solvent for cleaning firearms, Hoppe’s No. 9 is known for quickly removing carbon build-up. It’s also biodegradable and non-toxic, making it a safer choice for those concerned about the environment.
  3. Butch’s Bore Shine: A favorite of competitive shooters, Butch’s Bore Shine is one of the most effective solvents for removing carbon from firearms. It quickly cleans barrels and leaves behind a protective coating that helps prevent future build-up.
  4. Ballistol: Ballistol is a multipurpose cleaner used on various surfaces, including firearms. It’s effective in removing carbon build-up and also helps to protect your firearm against corrosion.
  5. Birchwood Casey Firearm Scrubber: This solvent quickly removes carbon build-up from firearms. It’s non-toxic and biodegradable, making it a safe choice for most firearm enthusiasts.
  6. Break Free CLP: A popular all-in-one cleaner, lubricant, and preservative. Break Free CLP is effective in removing carbon build-up from firearms. It also protects your firearm against rust and corrosion.
  7. Shooter’s Choice Carbon Cutter: This solvent quickly removes carbon build-up from firearms. It’s non-flammable and non-toxic, making it a safe choice for those concerned about the environment.

Things to Consider Before Buying Carbon Solvents

Carbon solvents are essential in preventing carbon build-up. However, there are a few things to consider before purchasing a carbon solvent. Some of them include:
  1. Type of solvent: First, you need to decide whether you want an aerosol or liquid solvent.
  2. The material the firearm is made from: Some solvents can damage certain materials, such as aluminum or magnesium alloys. So make sure you select a safe solvent to use on the material your firearm is made from.
  3. The severity of the carbon build-up: Carbon deposits can be stubborn and difficult to remove, especially if the deposits have stayed for extended periods. While some carbon build-ups can be removed with a simple wipe down, other build-ups may require a more powerful solvent. If you’re dealing with a lot of built-up carbon, choose a specifically designed solvent to break down carbon deposits.
  4. The environment: Some carbon solvents are more environmentally friendly than others. If you’re concerned about the impact your cleaning products have on the environment, be sure to choose a solvent that is biodegradable and non-toxic.
  5. The climate you will be using the solvent in: Some solvents are more effective in warmer climates, while others work better in colder climates. When choosing a solvent, ensure you select a solvent suited for the climate where you will be using it.
  6. The type of debris: Not all solvents effectively remove all types of debris. While some solvents are explicitly designed for carbon deposits, others are tailored to remove a combination of carbon, copper, and even lead deposits.
  7. Budget: Of course, budget is another important factor. With various solvents comes varying prices, so select a solvent within your spending budget.
  8. Cleaning time: If you’re always in haste to clean your firearms at the last minute, it will be advisable to go for a solvent with high solubility for carbon deposits. Such solvents can quickly dissolve the carbon debris, allowing you to proceed with other firearm maintenance operations.

Importance of Carbon Solvents

Carbon solvents are essential because they are specifically designed to remove carbon build-up from firearms. Moreover, allowing carbon deposits to build up on your firearm can cause a variety of problems, including:
  • Jamming the firearm
  • Making it difficult to pull the trigger
  • Causing the firearm to explode
  • Reducing the accuracy of the firearm
  • Giving the firearm a dirty appearance
  • Affecting the performance of the firearm
  • Causing the firearm to rust
Nonetheless, there are a few things that you can do to prevent carbon build-up on your firearm. Some of them include:
  • Regularly clean the firearm using a carbon solvent
  • Make sure that you store the firearm in a dry place
  • Lubricate the firearm after each use
Carbon solvents are an essential part of firearm cleaning and maintenance. They help remove carbon deposits from the bore, chamber, and other parts of the firearm. While these solvents can help you remove excess deposits, it’s crucial that you clean and lubricate your firearm regularly to ensure your firearm remains in perfect working condition.
At Armory Den, we offer a variety of firearm cleaning kits that can help you clean your firearm effectively without making a mess in the process. Our kits are designed to help you streamline your firearm cleaning process while allowing you to capture and reuse your cleaning solvent.
However, if you have any further questions about firearms or firearm cleaning kits, please don’t hesitate to contact us.

Read More

When to Take Your Firearm to a Gunsmith for Servicing?

Being an owner of a firearm comes with responsibilities. You must make sure that the equipment is regularly maintained to reduce the chances of a misfire or a malfunction. Even if you are legally allowed to purchase a firearm, it is crucial to educate yourself on matters related to firearm safety. One must respect the power that is had when becoming a gun owner and that involves ensuring the functionality and safety of this tool is up to par and in tact.
Firearm safety can include various processes, including taking firearm safety classes and understanding the right time to take your firearm for a professional servicing, such as to a local gunsmith.
Like all other equipment, a firearm goes through some wear and tear with time and use. As a result, the firearms functionality can be impaired. That is why it is important to leave its repairs and upkeep to professionals who know how to keep it looking good and firing right without compromising your safety. Unfortunately, if the problem is left untreated, the firearm can suffer additional damage and pose a life hazard.
Therefore, if your firearm experiences any problem, it is imperative to see a firearm repair professional to carry out a comprehensive analysis and highlight the relevant issues. A professional and licensed gunsmith will take accurate measures to resolve the persisting problems and ensure the firearm is returned safe for use and storage.
This guide will provide comprehensive information about the problems you can look for in a firearm. So, let’s get started!

There is a Hindrance in the Bore

The barrel’s bore can often be blocked by dirt, debris, or any other impurities. When this happens, the trajectory of your projectile can be drastically impacted. This means that you will not have the desired accuracy when you fire your equipment, thus making the venture quite dangerous for yourself and the individuals within your vicinity. If you notice that the bore is obstructed during your firearm maintenance, you need to bring your firearm to a professional.
Additionally, if the barrel’s bore is blocked and remains untreated, your firearm can suffer additional damage over time. Essentially, this issue can cause the entire machine to degrade with time. Therefore, if you are experiencing this issue, it is essential to see a professional firearm repair service as soon as possible.

There is a Visible Crack

As a firearm owner, you have first-hand experience on the impact of the equipment when it is fired. This impact does not only affect you, but the force also leaves an influence on the firearm as well.
Fortunately, the quality models of firearms are crafted with tempered steel, making them highly durable and resilient to use for a long time. However, if you use an older or an antique firearm, you may experience this issue.
You can identify the impact damage to the firearm by checking the equipment for pressure cracks. Although cracks can appear anywhere on the equipment, they are most commonly observed on the chamber, bolt, or stock. If you find a crack on your firearm, it is crucial to visit a gunsmith as soon as possible. Failure to do so will cause further strains and malfunctions, especially if the firearm is consistently used.

There Is An Issue With The Timing

Another common issue that mandates a professional firearm repair service is a problem with the firearm’s timing. If your firearm is experiencing a timing issue, it can lead to several additional issues, such as misfiring. This can prove to be dangerous for you and the people around you.
A gunsmith would have to disassemble the firearm to repair it proficiently to resolve this problem. The process will require specific tools and instruments to measure the firearm’s timings based on its caliber.

Your Firearm's Safety is Compromised

The safety component is one of the most critical aspects of the firearm. If the safety is compromised, you must see a professional firearm repair service as soon as possible. You can discover the malfunction in the safety feature by ensuring if it disables the firing mechanism. In the unfortunate case that this feature is unavailable, your firearm can pose a threat. Therefore, it is essential to find professional assistance to carry out immediate safety repairs.

There is a Problem with the Firing Pin

As stated earlier, firearms follow the same methods that all machinery does. Therefore, it is highly likely that your firearm will undergo stress and result in problems in its components. One of the most common issues is experienced with the firing pin.
The firing pin can become warped or distorted if you frequently use it. When this happens, you can experience primer ruptures. Due to this, your firearm can undergo significant damage, resulting in firing problems and additional firearm damage.

There is Corrosion in the Barrel

Another common problem that firearm owners experience is corrosion in the barrel. When corrosion occurs, it initiates from the end of the barrel and makes its way inside. If you see any signs of deterioration in the barrel, the metal may have weakened. Essentially, this will affect the way your firearm performs.
This is why it is essential to see a gunsmith as soon as possible. A firearm repair professional will remove the affected segment to prevent the corrosion from spreading to the other parts of your firearm.

There's Warpage in the Wood

Another reason to see a professional firearm repair service is if the wooden stock seems to have changed shape or warped. When the stock begins to shift, it can significantly affect your firearm’s performance. Therefore, it is essential to take the equipment to a professional who can fix this issue safely and securely.

Explore Quality Firearm Maintenance Kits

Firearm owners need to protect and maintain their equipment to ensure safe usage. As mentioned above, you can always take your firearm to a professional if you experience any issues. However, you can also take preventative measures by performing some firearm maintenance routine yourself, such as cleaning the firearm using a quality solvent trap kit. You can visit Armory Den to check out the vast range of solvent trap kits to upkeep your firearm correctly.

Read More

How to Protect Your Firearm from Cold Weather?

Firearms need to be protected from the cold weather just like any other piece of equipment. If you are not careful, your firearm can become damaged and inoperable. In this blog post, we will discuss some tips on how to protect your firearm from the cold weather. We will also cover some basic maintenance tips that should be followed to keep your firearm in good working condition.

Effects of Cold Weather on Your Firearm

One of the biggest dangers to firearms in cold weather is condensation. When warm air hits a cold surface, it can cause condensation to form. This can happen when you take your firearm out of a case or holster that is warm and then expose it to the cold air. The moisture from the condensation can freeze and cause damage to your firearm. To prevent this from happening, you should store your firearm in a cool, dry place. If you are going to be transporting your firearm in a vehicle, make sure that it is not exposed to direct sunlight or heat sources.
Another danger to firearms in cold weather is freezing. Water can freeze and expand inside the metal parts of your firearm, causing them to crack or break. To prevent this from happening, you should store your firearm in a cool, dry place. If you are going to be transporting your firearm in a vehicle, make sure that it is not exposed to direct sunlight or heat sources. You should also avoid letting your firearm get wet. If it does get wet, make sure that you dry it off as soon as possible.

Tips On Winter Firearm Care

Firearm Maintenance is important all year round but becomes even more critical in cold weather months. A few simple tips can help to keep your firearm in optimal working condition and prevent any damage caused by freezing temperatures or moisture buildup.

Get A Portable Firearm Cleaning Kit

A portable Firearms Cleaning Kit is a great way to protect your firearm from the cold weather. These kits come with all of the necessary cleaning supplies that you need to keep your firearm in good working condition. They also have a storage case that can be used to protect your firearm from the cold weather.
By investing in a Portable Firearm Cleaning Kit, you can help to prolong the life of your firearm and keep it in good working condition. These kits are a great investment for any firearm owner.

Keep Your Firearm Dry

One of the best ways to protect your firearm from the cold weather is to keep it dry. Moisture can cause condensation and freezing, which can damage your firearm. If you are going to be transporting your firearm in a vehicle, make sure that it is not exposed to direct sunlight or heat sources. You should also avoid letting your firearm get wet. If it does get wet, make sure that you dry it off as soon as possible.

Protect Your Ammunition

Another way to protect your firearm from the cold weather is to protect your ammunition. Ammunition can be damaged by moisture and freezing. To prevent this from happening, you should store your ammunition in a cool, dry place. You should also avoid exposing your ammunition to direct sunlight or heat sources.

Keep it Clean & Lubricated

It is important to keep your firearm clean and lubricated. This will help to prevent condensation and freezing, which can damage your firearm. You should clean your firearm after each use. If you are going to be storing your firearm for an extended period of time, you should give it a thorough cleaning before you put it away.
You should also lubricate your firearm before you store it. This will help to protect it from the cold weather. You should also lubricate your firearm regularly. This will help to keep the moving parts of your firearm from freezing or getting damaged.

Inspect Your Firearm After Every Carry Session

The importance of regularly inspecting your firearm cannot be overstated enough – especially during cold weather months.
After you have carried your firearm, it is important to inspect it. This will help to ensure that your firearm is in good working condition. You should also clean and lubricate your firearm after each carry session.

Take Precautions While Transporting Your Firearm

When you are transporting your firearm, there are a few things that you should do to protect it from the cold weather.
First, make sure that your firearm is unloaded.
Second, make sure that your firearm is not exposed to direct sunlight or heat sources.
Third, make sure that your firearm is not exposed to moisture.
Fourth, make sure that you keep your ammunition in a cool, dry place.
Fifth, make sure that you keep your firearm clean and lubricated.
If you notice any problems with your firearm, such as misfires or jams, make sure that you take it to a qualified gunsmith for repair or replacement parts.

Wrapping Up

By following these tips, you can help to protect your firearm from the cold weather and keep it in good working condition. These tips will also help to prolong the life of your firearm and keep it in good working condition. Firearm maintenance is important for all gun owners, but it is especially important in cold weather. By taking a few simple precautions, you can help to ensure that your firearm will be safe and ready to use when you need it.
Armory Den is committed to helping our customers keep their firearms in good working condition. We offer a wide selection of firearm cleaning and maintenance products. If you have any questions about how to protect your firearm from the cold weather, or if you would like more information about solvent traps cleaning kits, please contact us.

Read More

10% Off Promo Code! DEN10